Introduction
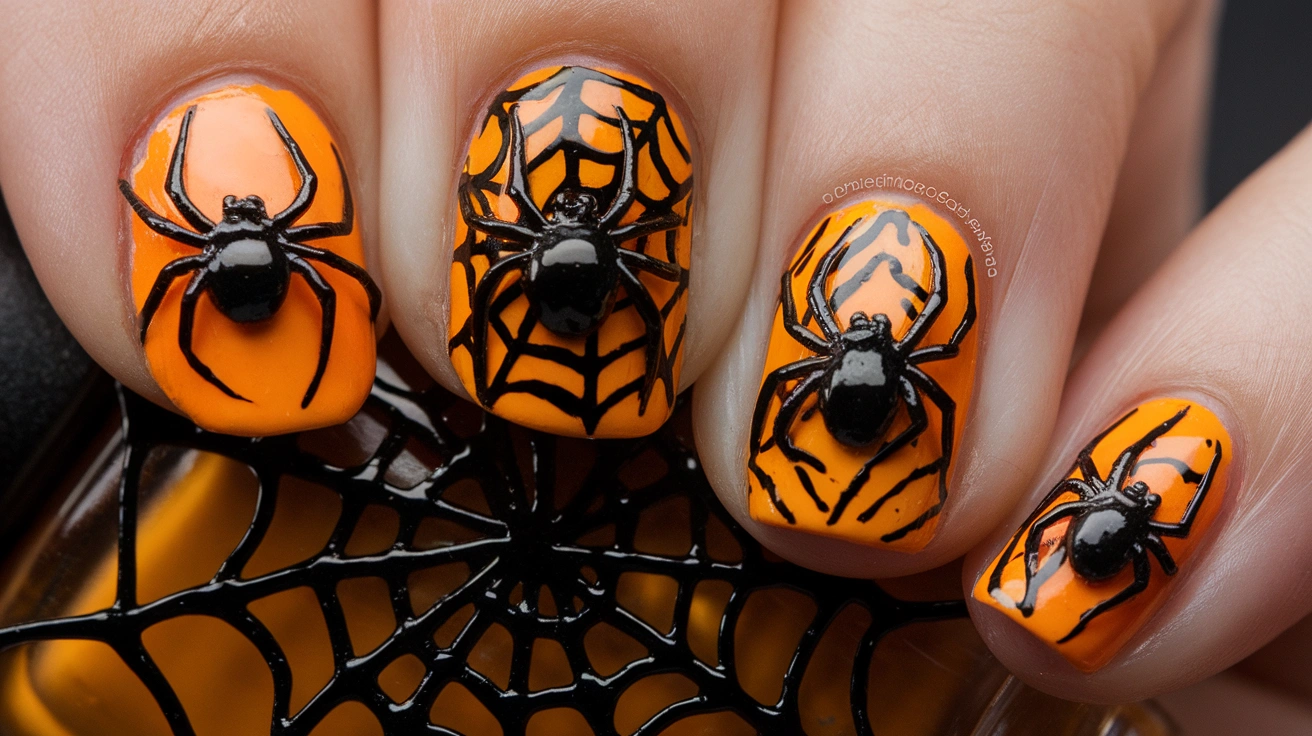
Looking for 22 Halloween-Themed Nail Designs that feel fun, spooky, and stylish enough for your next October manicure? Halloween is the perfect time to experiment with colors, characters, patterns, and finishes that you might not normally wear. From tiny ghosts and black cats to pumpkins, spiderwebs, skulls, vampire-inspired details, and mysterious moonlit scenes, seasonal nail art gives you plenty of creative freedom. You can choose a playful design for a Halloween party or keep things subtle with a dark French tip and one tiny accent. The best designs are not always the most complicated ones. A thoughtful color combination, clean nail shape, and carefully placed detail can create an eye-catching manicure that feels polished and personal.
Your Halloween manicure can also match the mood you want to create. Deep black and burgundy shades work beautifully for gothic looks, while orange, purple, and creamy tones can create something more playful and colorful. If you prefer minimalist nails, choose one accent design and keep the remaining fingers simple. For a bolder appearance, combine several seasonal details across different nails while keeping the color palette consistent. I’ve noticed that choosing the nail shape first can make the artwork much easier to plan because some designs need more surface area than others. Whether you are heading to a costume party, planning a spooky night with friends, or simply enjoying October, these ideas can help you create nails that feel festive, creative, and completely your own.
Spooky Pumpkin Accent Nails
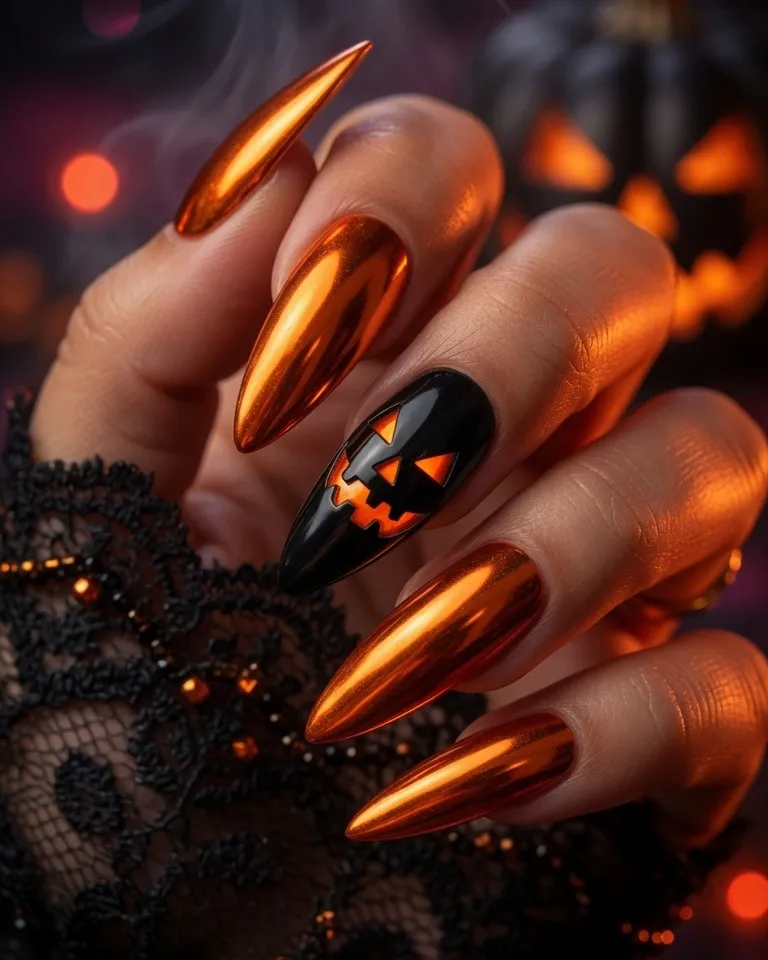
Pumpkin accents instantly give a manicure a playful Halloween personality without requiring every nail to have detailed artwork. Keep most nails glossy black, then use one accent nail with a small orange pumpkin for contrast. The simple color combination makes the design easy to recognize while keeping the overall manicure polished. A short almond or rounded shape works especially well because it gives enough space for the pumpkin detail without making the nails feel too busy. I’ve noticed that accent designs are also practical when you want something festive but still wearable beyond a Halloween party. Add tiny green leaves or a delicate stem if you want the pumpkin to look more detailed. You can also choose a matte black base for a softer appearance or keep everything glossy for a more dramatic finish. This design works beautifully with Halloween outfits, cozy sweaters, and simple black accessories throughout the spooky season.
- Creates an instantly recognizable Halloween look
- One accent nail keeps it balanced
- Works beautifully with black polish
- Easy to personalize with tiny details
A pumpkin accent can be styled in several ways depending on the mood you want. For a cute appearance, use a rounded orange pumpkin with tiny eyes and a smiling expression. For something more elegant, create a simple pumpkin silhouette without facial details and add a small gold stem. Keep the remaining nails solid black, deep brown, or dark purple so the accent remains the main focus. A glossy topcoat will make the orange design stand out, while a matte background can create a more sophisticated contrast. For Pinterest-style photographs, place the hand against a dark background with subtle autumn textures such as dried leaves, black fabric, or a small pumpkin nearby. Avoid overcrowding the composition because the manicure itself should remain the focal point. The finished design feels festive, playful, and polished, making it suitable for Halloween parties, October outings, costume events, or anyone who enjoys seasonal nail art with a simple statement detail.
Black Cat Halloween Nails
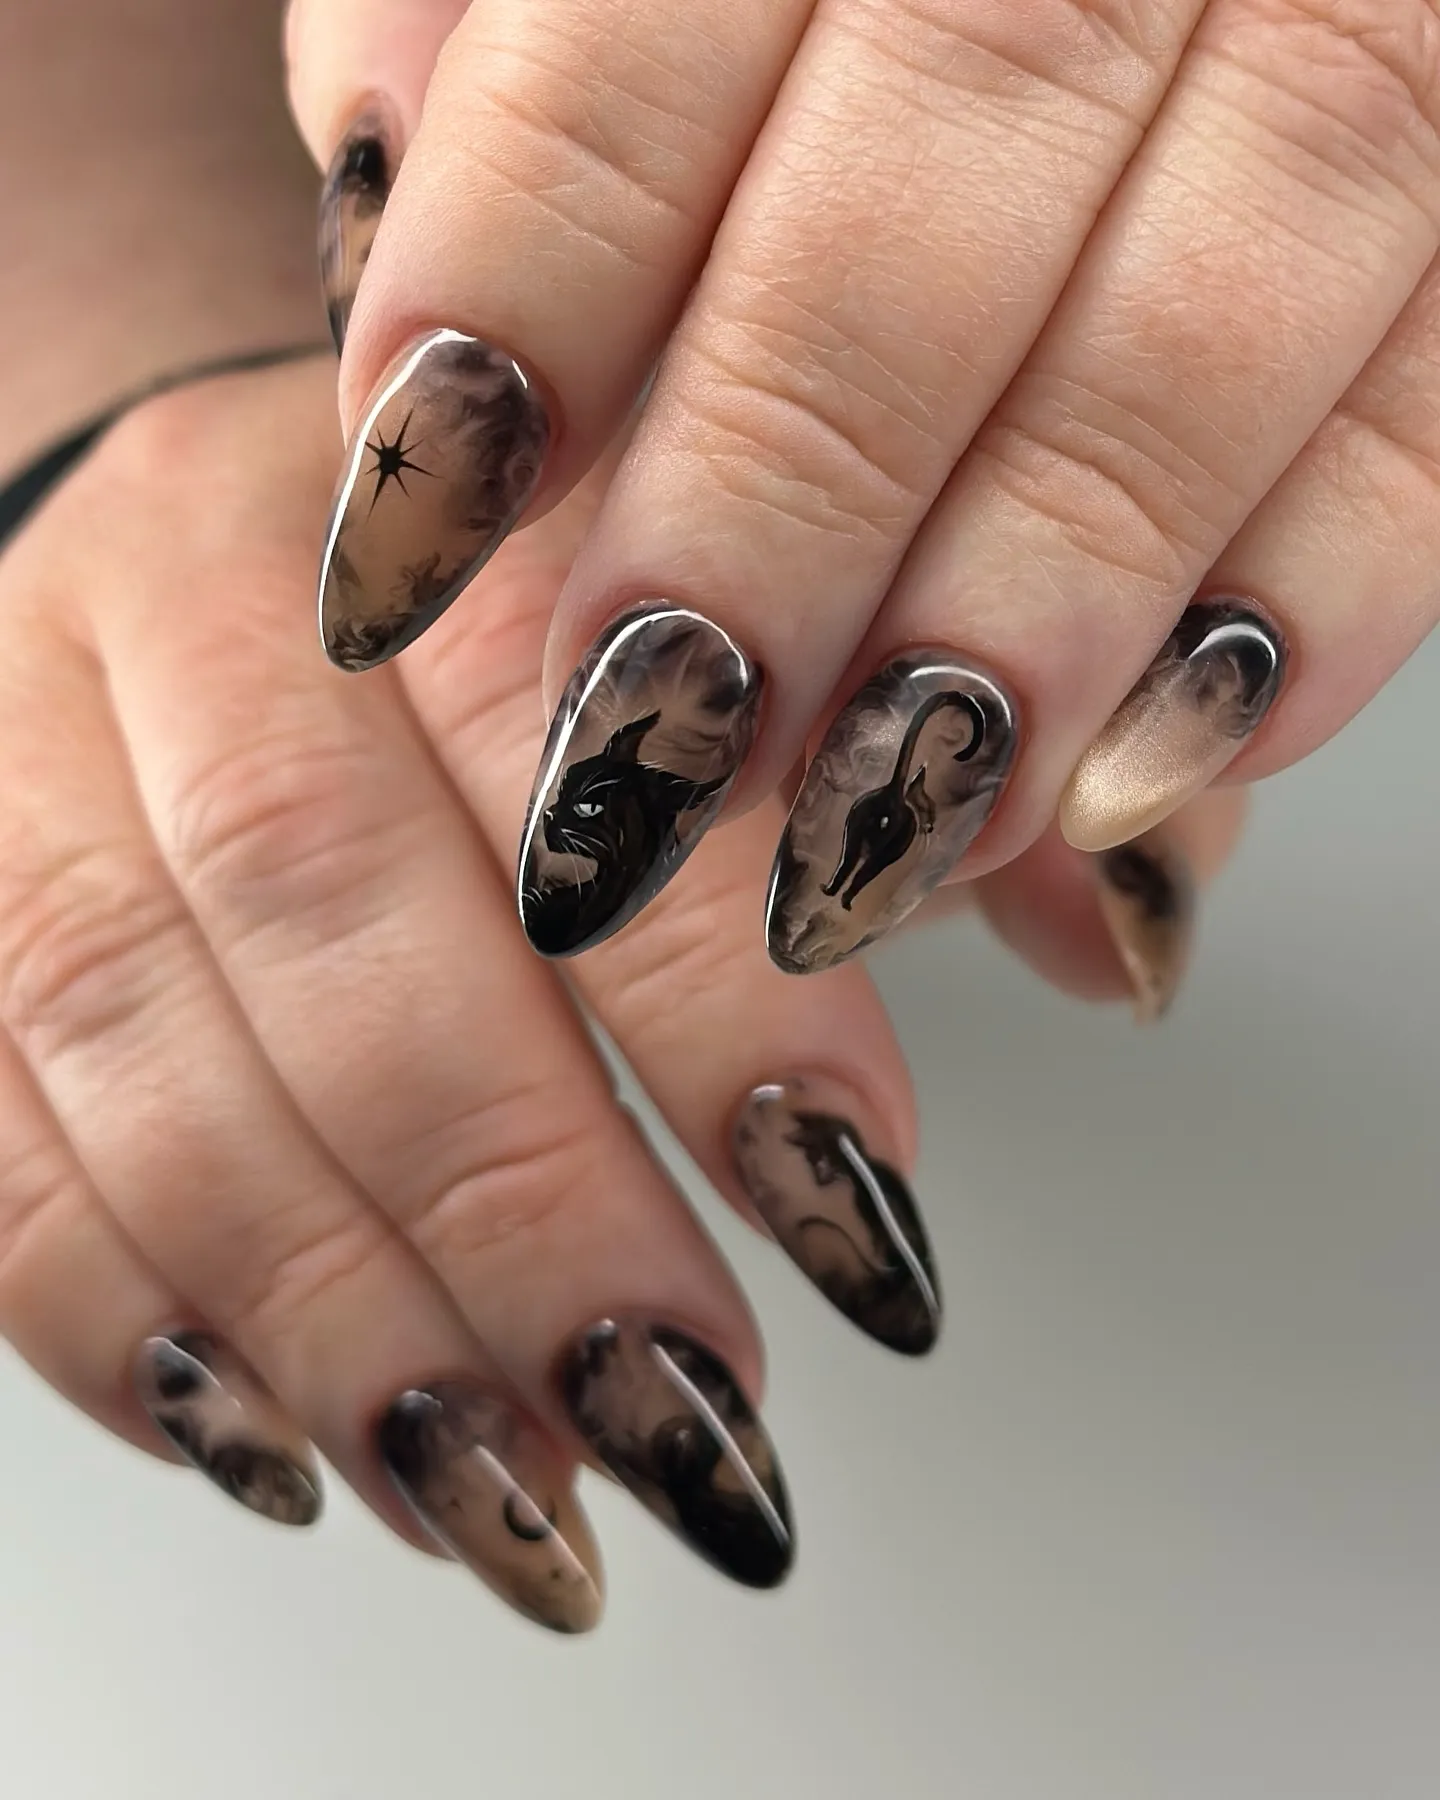
Black cat nail art creates a classic Halloween look with a mysterious and playful personality. Deep purple or black polish provides a dramatic background, while small cat silhouettes add recognizable seasonal detail. You can keep the artwork simple by drawing only pointed ears and curved bodies, or add tiny glowing eyes for extra character. A medium oval or almond shape gives the design enough surface area while maintaining an elegant appearance. I’ve noticed that Halloween nail art often looks more polished when the illustrations are kept small and repeated consistently rather than covering every nail with complicated scenes. Add a tiny crescent moon or scattered stars to create a nighttime theme without making the manicure crowded. Glossy polish works beautifully for a sleek finish, while a matte base can make the artwork feel more modern. This design pairs naturally with black outfits, Halloween costumes, spooky accessories, and autumn gatherings where you want your manicure to become part of the overall theme.
- Creates a playful spooky atmosphere
- Works beautifully with dark polish
- Small silhouettes keep the design elegant
- Easy to customize with moons or stars
Black cat nails can range from cute to mysterious depending on the colors and facial details you choose. For a softer look, use purple or dark gray as the base and create simple black cat silhouettes. For stronger contrast, use a black base with tiny orange or white eyes. A crescent moon on one nail can help connect the separate designs and create a consistent nighttime theme. Keep the artwork clean and relatively small so the manicure remains easy to wear. Gold stars can add a subtle decorative touch without making the design overly colorful. For photographs, use low warm lighting and a dark neutral background to emphasize the Halloween atmosphere. You can also place a small black cat accessory or crescent-shaped decoration nearby for visual context. The final result feels spooky, charming, and stylish at the same time. It is a great option for anyone who wants recognizable Halloween nail art without using overly complicated illustrations.
Ghost French Tip Nails
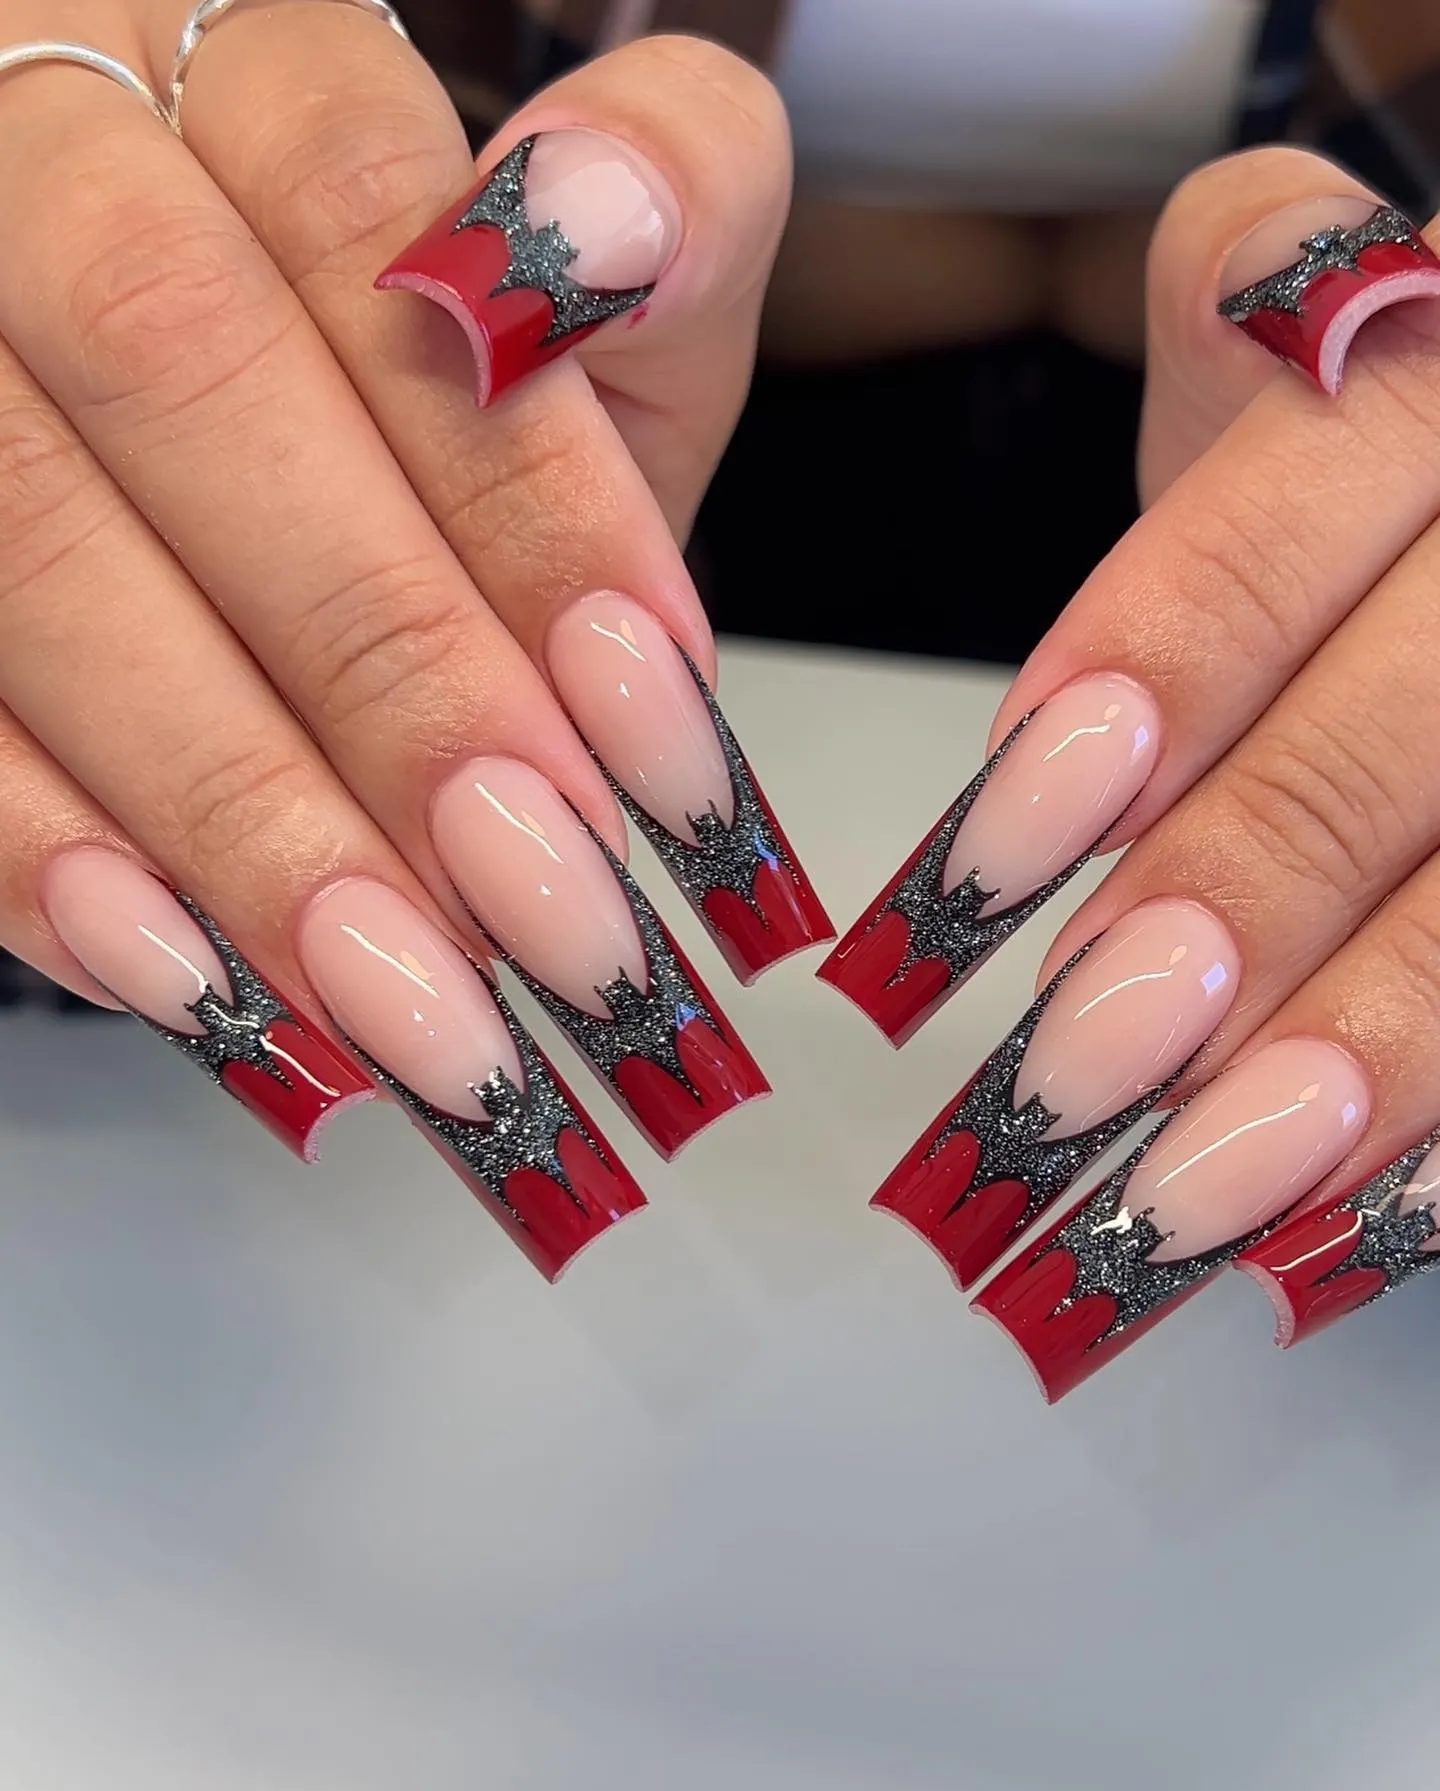
Ghost French tips combine a classic manicure structure with playful Halloween artwork. A sheer nude or pale pink base keeps the nails looking clean and elegant, while tiny white ghosts appear along dark French tips for a seasonal twist. The ghost figures can be simple rounded shapes with tiny black eyes, making the design recognizable without requiring complicated artwork. Medium almond or oval nails provide enough space for the French tip while keeping the overall silhouette graceful. This style works particularly well if you normally prefer minimalist nails but want something festive for October. I’ve noticed that using a neutral base helps Halloween details feel less overwhelming and makes the manicure easier to coordinate with different outfits. You can keep the tips black for a classic spooky appearance or use dark purple for a softer variation. A glossy topcoat ties everything together and gives the tiny ghosts a clean, polished finish suitable for Halloween parties, casual gatherings, or seasonal photos.
- Combines classic French styling with Halloween
- Neutral base keeps the look balanced
- Tiny ghosts create playful detail
- Works well with almond shapes
The ghost French tip design can be adjusted to suit different personalities. Keep the ghosts small and evenly spaced for a refined manicure, or make their expressions slightly different for a playful appearance. A sheer nude base works especially well because it lets the black tips and white ghosts remain clearly visible. You can also add one tiny orange pumpkin or purple star as an accent without changing the overall minimalist character. For a more dramatic version, replace the nude base with a translucent smoky gray. Keep the French tips relatively thin so the nails do not look visually heavy. Soft natural lighting is ideal for showing the contrast between the sheer base and the detailed artwork. For Pinterest photos, use a dark neutral surface and subtle Halloween props around the hand. The finished design feels cute, polished, and festive while still being sophisticated enough for anyone who prefers Halloween nail art that does not cover the entire nail.
Blood Drip Red Nails
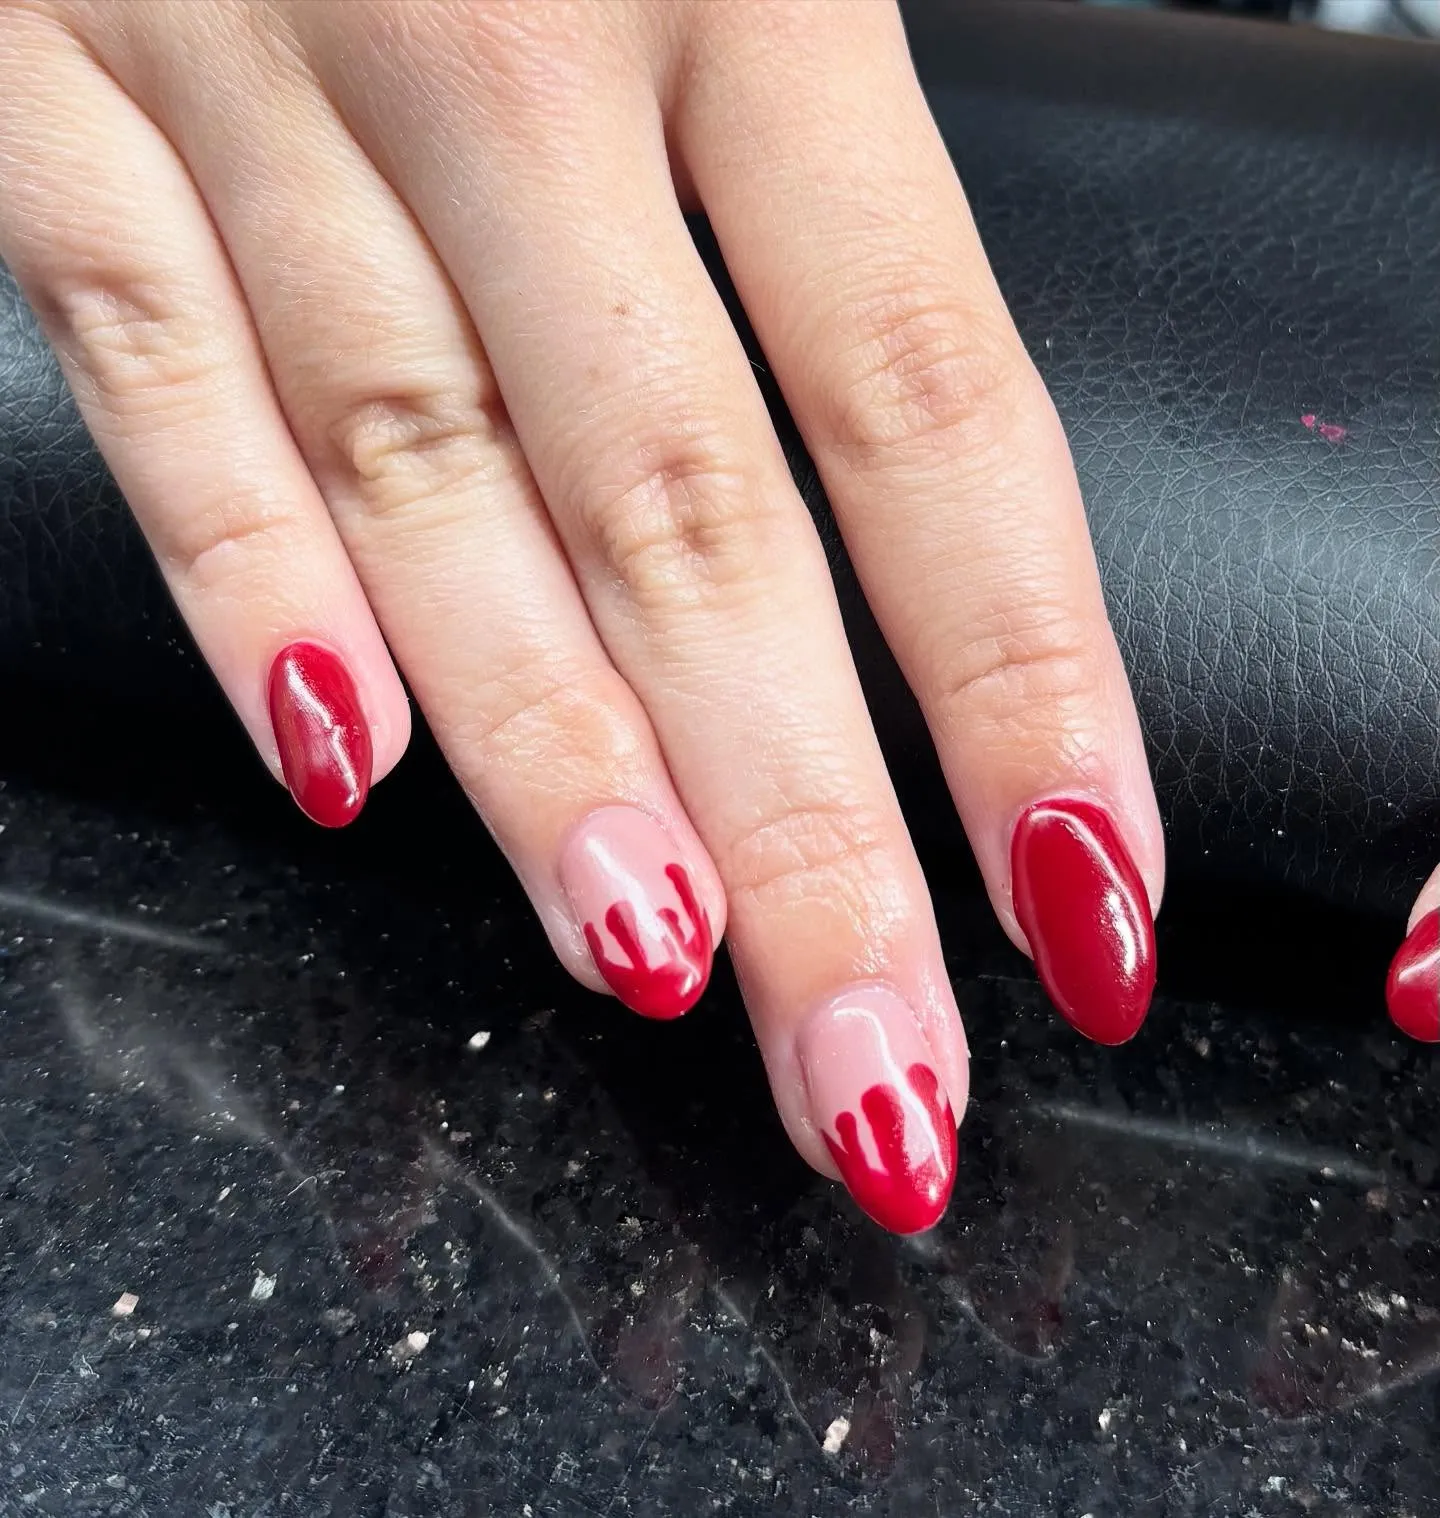
Blood drip nails create a bold Halloween manicure with dramatic contrast and an instantly recognizable spooky theme. Start with a glossy black base and add deep red drips beginning near the tips or cuticle area. The uneven shapes make the design look intentionally creepy while still being relatively simple to recreate. Medium coffin or almond nails provide enough space for the drips to remain visible without making the manicure feel crowded. I’ve noticed that using a darker red instead of bright cherry red creates a more sophisticated gothic effect, especially when paired with black polish. You can keep every nail consistent or make one or two nails slightly different for a more artistic finish. A high-shine topcoat helps the red details appear wet and dimensional, strengthening the dramatic effect. This design works especially well with gothic outfits, Halloween costumes, dark accessories, and evening parties. If you want your nails to make a strong statement, blood drip artwork provides a memorable seasonal option.
- Creates dramatic Halloween contrast
- Works beautifully with black polish
- Dark red adds gothic depth
- Ideal for bold seasonal styling
Blood drip artwork looks strongest when the color contrast is clear and the shapes remain intentionally irregular. Use a deep wine red for a more sophisticated gothic appearance, or choose brighter red when you want a stronger Halloween effect. The black base should remain glossy and smooth so the red details appear crisp against it. Keep the drips varied in length rather than making every line identical, which creates a more natural dripping effect. For a less intense version, use a nude or smoky gray base instead of black. A small amount of silver or dark glitter can also be added to one accent nail if you want extra dimension. For photography, use dramatic side lighting with a dark background to emphasize the glossy finish. The completed manicure feels bold, spooky, and theatrical without needing detailed illustrations. It is especially suited to Halloween parties, costume nights, gothic fashion, and anyone who enjoys statement nail designs.
Purple Spiderweb Nails
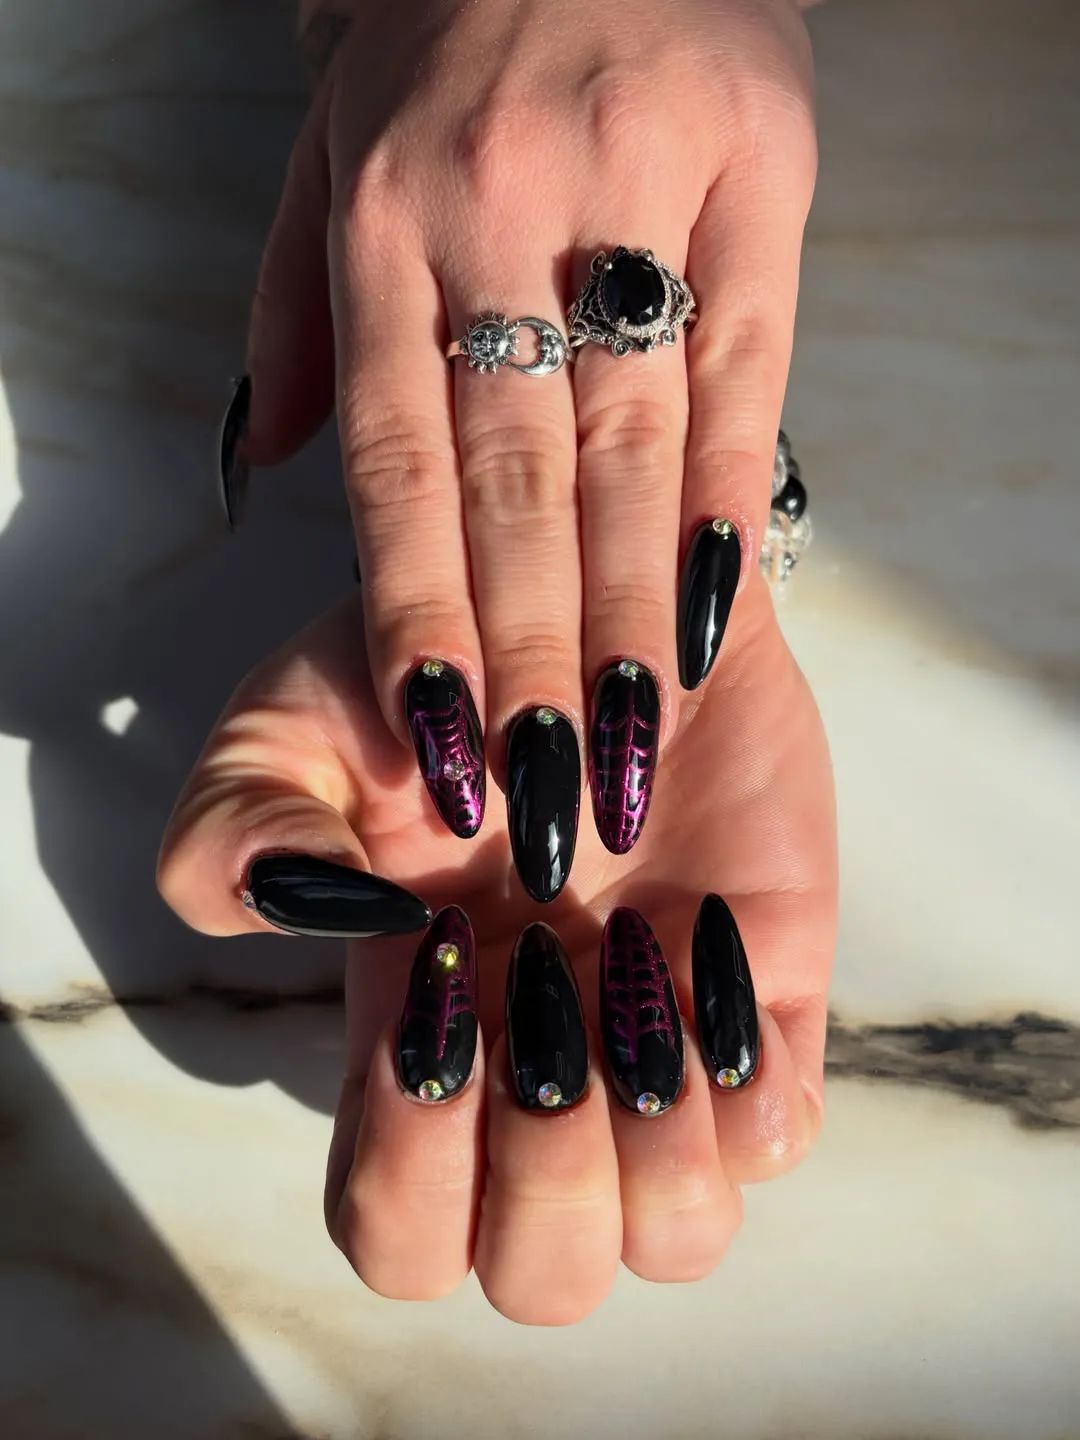
Purple spiderweb nails create an elegant Halloween design by combining a rich seasonal color with delicate gothic details. A deep purple base gives the manicure depth, while thin black spiderweb lines create a recognizable spooky pattern without overwhelming the nails. Medium almond or oval shapes work beautifully because they provide enough space for the web details while keeping the overall manicure refined. You can place spiderwebs on only two or three nails and leave the others solid purple for a more balanced appearance. I’ve noticed that thin lines are especially important for this design because heavy web patterns can make the nails look crowded. A tiny silver or black spider can be added to one accent nail for extra Halloween character. Glossy polish gives the purple color more richness and makes the design photograph beautifully. This manicure is a strong choice for anyone who wants spooky nail art that feels sophisticated, stylish, and slightly mysterious.
- Creates an elegant gothic Halloween look
- Purple adds rich seasonal color
- Spiderweb details keep it recognizable
- Works well with minimal accents
Spiderweb designs can easily become too complicated, so keeping the lines thin and evenly spaced helps maintain a polished appearance. Start with a deep purple base and use black or very dark gray for the web pattern. If you want stronger contrast, use white or silver lines instead. Place the web near one corner of the nail rather than covering the entire surface for a more modern result. You can also add one tiny spider using black polish or a small metallic detail. For Pinterest photography, pair the manicure with dark fabric, soft candlelight, or subtle Halloween decorations while keeping the background uncluttered. The purple base can look especially beautiful under warm lighting because its deeper undertones become more visible. The finished design feels mysterious, elegant, and festive without becoming overly cartoonish. It works well for Halloween parties, evening events, gothic-inspired outfits, or anyone who wants seasonal nail art with a more refined visual style.
Cute Candy Corn Nails
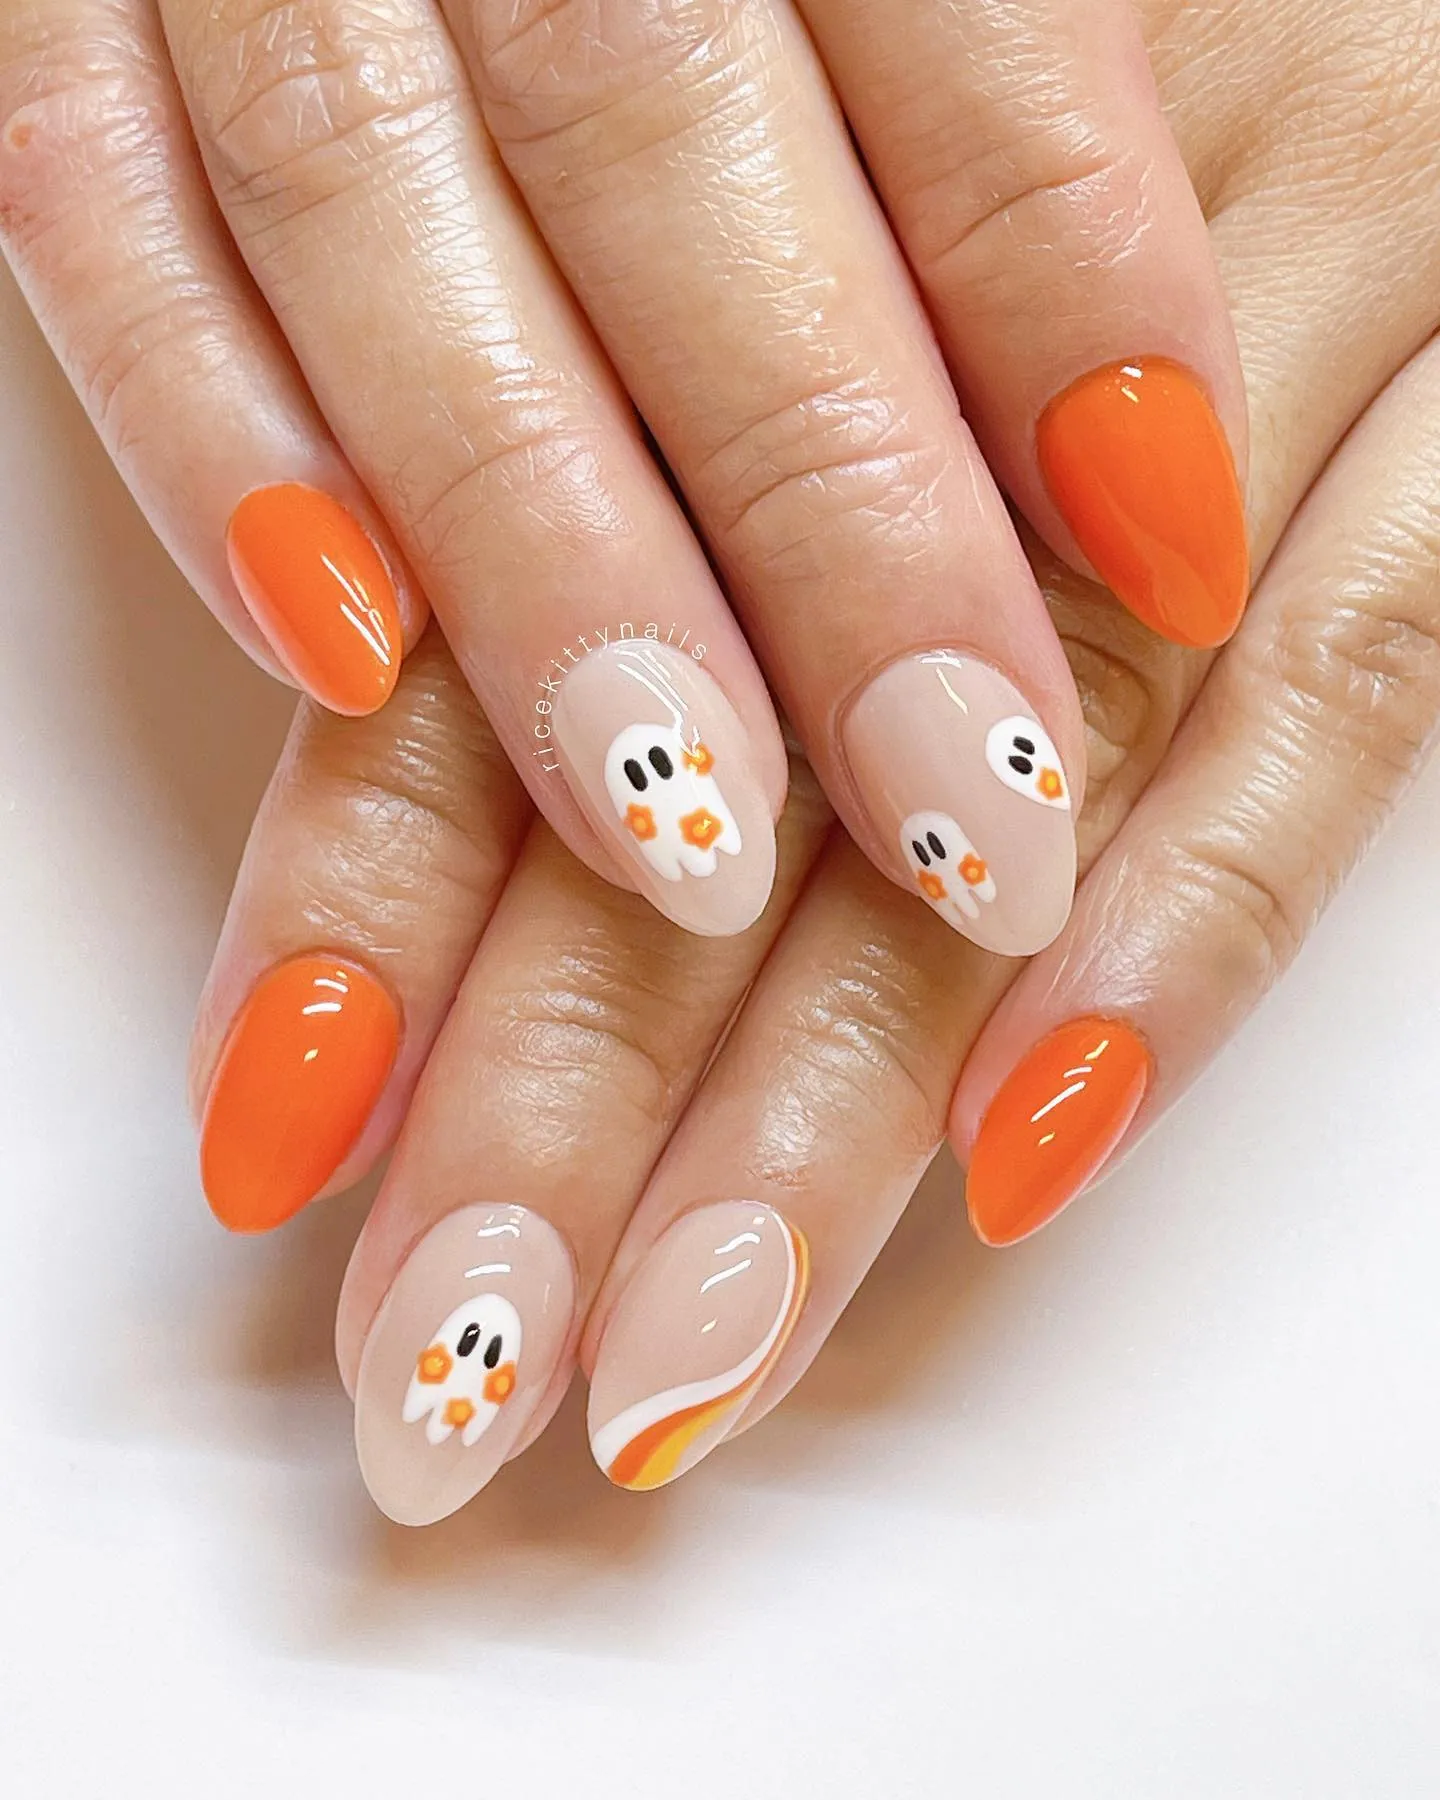
Candy corn nails bring a playful Halloween feeling through one of the season’s most recognizable color combinations. The design uses creamy white, warm yellow, and bright orange in layered sections that resemble the classic candy. A short rounded or medium square shape works well because the simple color blocks remain easy to see without requiring a large nail surface. I’ve noticed that this style looks best when the colors are clearly separated and the lines remain neat, giving the manicure a polished appearance instead of making it look overly busy. You can repeat the candy corn pattern across every nail or use it on just a few accent nails while keeping the rest orange or cream. A glossy finish enhances the cheerful colors and makes the manicure look fresh. This design is especially fun for Halloween parties, pumpkin-carving nights, costume events, or anyone who prefers cute seasonal nails over darker gothic styles.
- Uses classic Halloween colors
- Creates a cheerful playful appearance
- Works well on shorter nails
- Easy to combine with accent nails
Candy corn colors can be used in several different ways to create a balanced manicure. For the most recognizable version, divide each nail into three horizontal sections with creamy white near the tip, yellow through the middle, and orange toward the base. You can also reverse the arrangement or create small candy corn shapes on a neutral background for a more delicate appearance. If you want to keep the manicure wearable, place the full pattern on only two or three nails and use a solid orange or cream shade on the others. A glossy topcoat helps the colors appear brighter and more cohesive. For Pinterest photographs, use a dark background with small candy corn or pumpkin props nearby to reinforce the theme. Keep the styling simple so the manicure remains the focus. The finished look feels cheerful, nostalgic, and festive, making it ideal for anyone who enjoys cute Halloween designs with recognizable seasonal colors and playful details.
Haunted Moonlit Nails
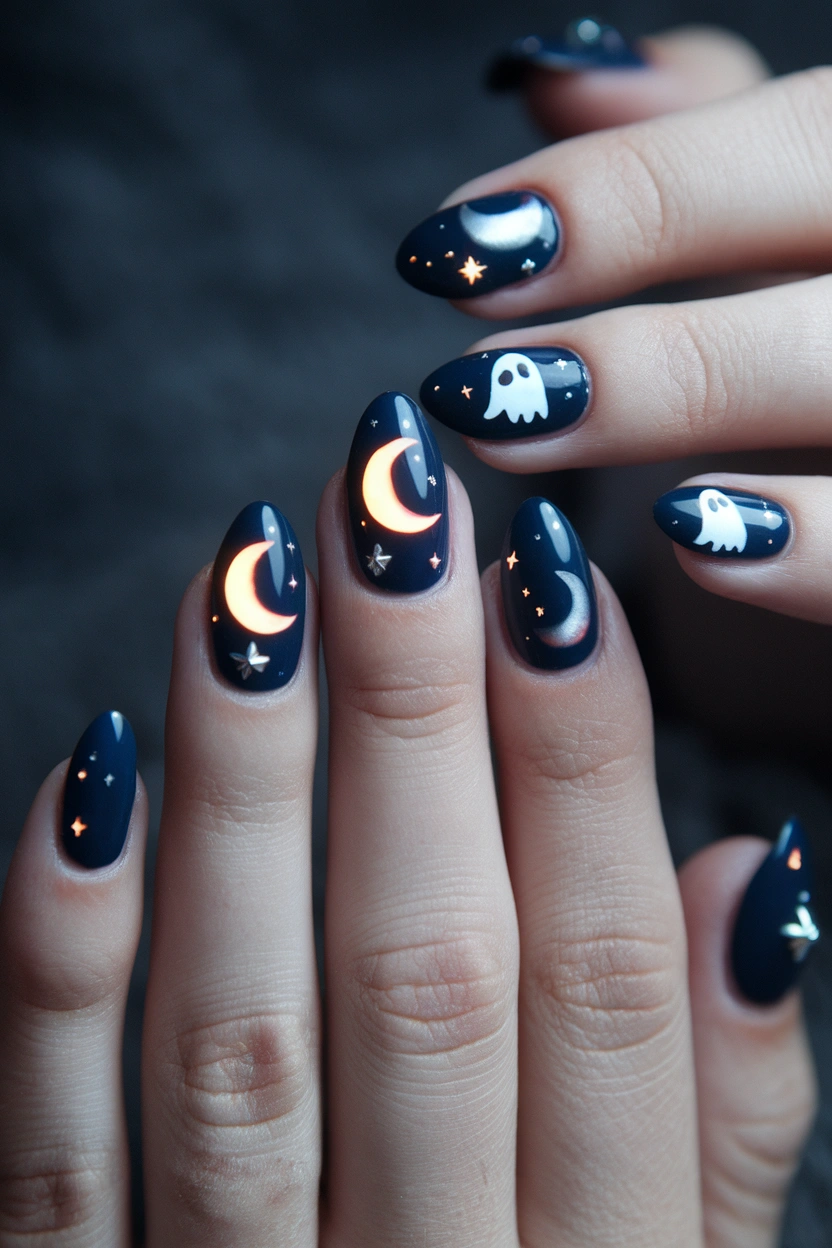
Haunted moonlit nails create a mysterious Halloween atmosphere by combining dark colors with tiny nighttime details. A deep navy or black base provides the perfect background for crescent moons, small stars, and delicate ghost silhouettes. The design feels more atmospheric than traditional Halloween nail art because it focuses on a spooky night sky rather than pumpkins or bright seasonal colors. Medium almond or oval nails provide enough space for small details while keeping the manicure elegant. I’ve noticed that using silver or pale lavender accents instead of bright white can make the design feel softer and more sophisticated. Keep most nails dark and use detailed artwork on only two or three fingers to maintain visual balance. A glossy finish gives the colors depth and makes tiny moon details stand out. This manicure works beautifully for evening Halloween events, gothic outfits, costume parties, or anyone who wants seasonal nail art that feels mysterious rather than cute.
- Creates a mysterious nighttime mood
- Works beautifully with dark polish
- Small details keep it elegant
- Perfect for gothic Halloween styling
The moonlit theme gives you plenty of room to customize the manicure without making it complicated. Use deep navy for a softer appearance or pure black for a stronger gothic effect. Add small silver crescent moons, tiny stars, or simple ghost silhouettes across selected nails. Keep the artwork delicate so the dark background remains dominant and creates the feeling of a nighttime sky. A subtle lavender or icy blue accent can add dimension without introducing too many colors. For photography, use cool-looking lighting or a dark neutral background to emphasize the moonlit atmosphere. Silver jewelry can also complement the design beautifully without distracting from the nails. A glossy finish helps the darker colors look rich and polished, while tiny metallic details catch the light naturally. The final manicure feels mysterious, elegant, and distinctly Halloween-inspired while remaining sophisticated enough for evening events and anyone who prefers atmospheric seasonal nail art over bright cartoon-style designs.
Creepy Eyeball Nail Art
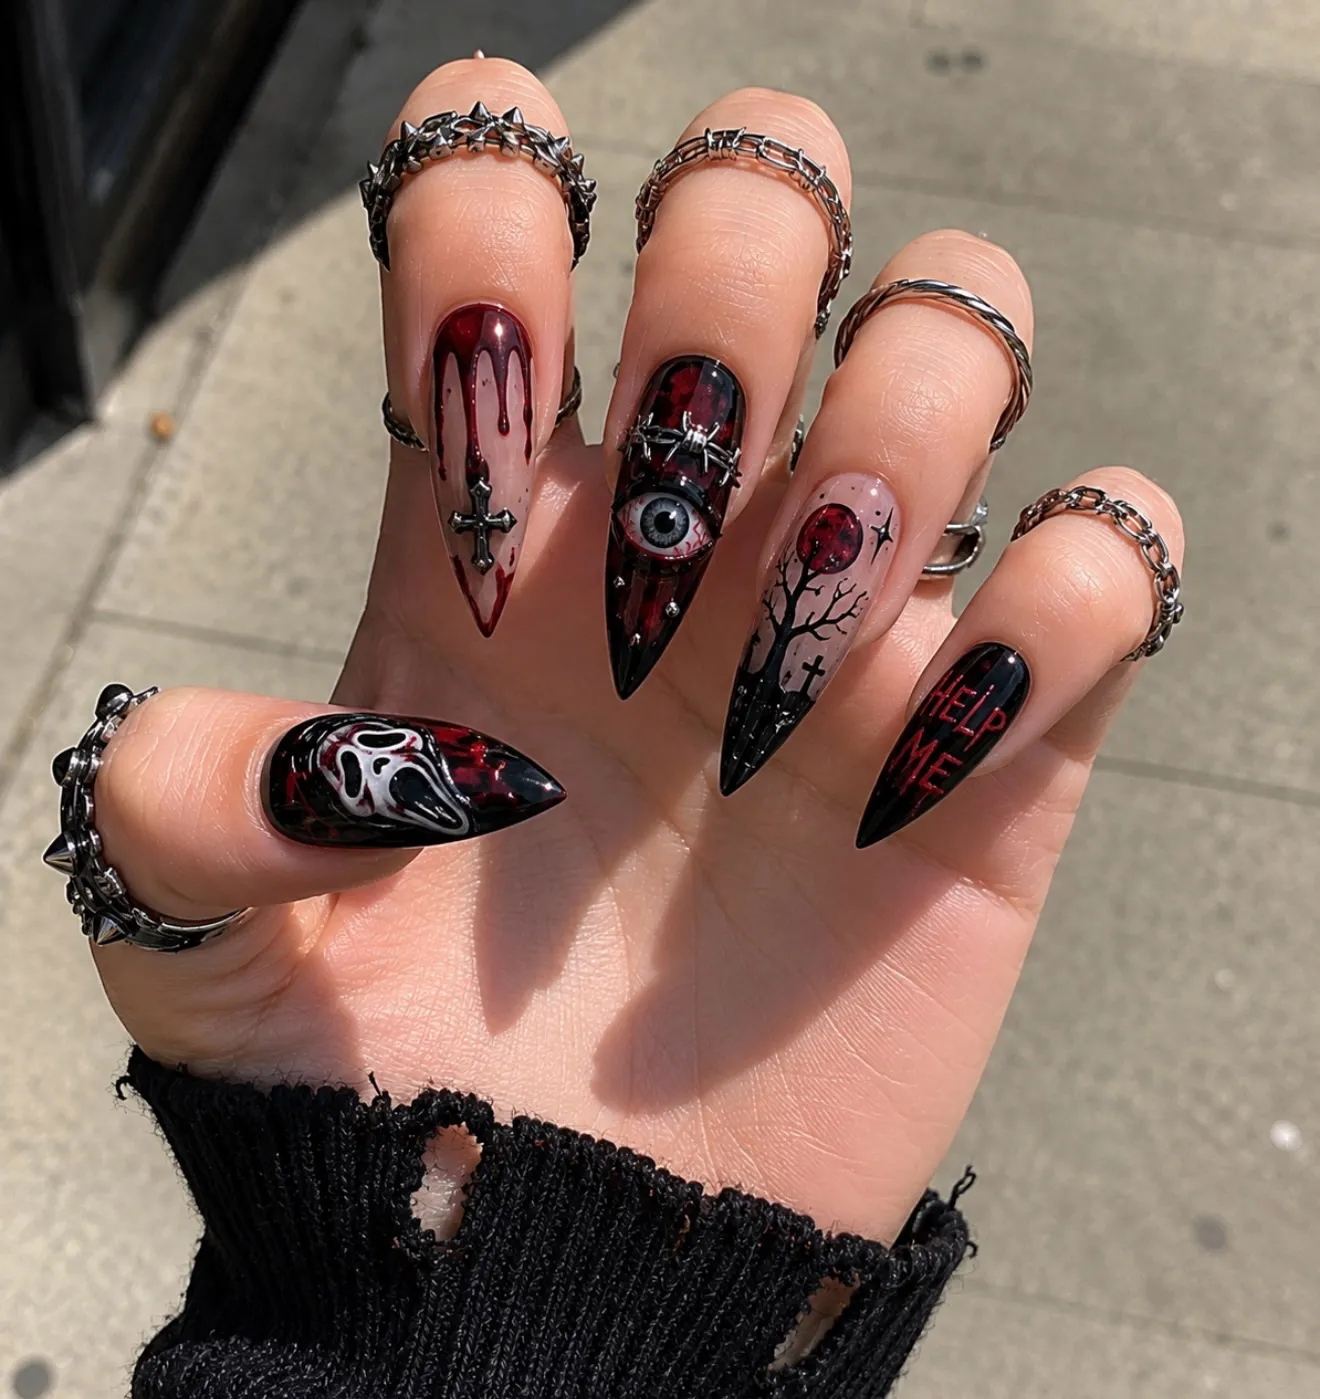
Creepy eyeball nails create an instantly spooky Halloween manicure without requiring complicated patterns across every nail. A glossy black base provides a dramatic background, while white eyeball details with red veins create strong contrast and make the artwork immediately noticeable. You can place one large eye on an accent nail or use smaller eyes across several nails for a more playful effect. Medium almond or coffin shapes provide enough surface area for detailed artwork while keeping the overall manicure stylish. I’ve noticed that using only two or three detailed accent nails often makes Halloween designs look cleaner and easier to wear. Keep the remaining nails black, deep purple, or dark red to maintain a consistent palette. A glossy topcoat can make the artwork look more vivid and polished. This design is ideal for Halloween parties, costume events, spooky gatherings, or anyone who wants nail art that feels creepy, dramatic, and visually striking.
- Creates an instantly spooky effect
- Black polish makes eyes stand out
- Accent nails keep the design balanced
- Works well for Halloween parties
Eyeball artwork can be customized depending on how creepy or playful you want the manicure to look. For a subtle version, create one realistic eye on a single accent nail and keep everything else glossy black. For a stronger Halloween effect, add several eyes with different sizes and directions so the manicure feels more unusual. Tiny red veins can create extra detail, but they should remain fine and controlled rather than covering the entire nail. A deep red or purple accent nail can also complement the eye designs without distracting from them. For photography, use a dark background and dramatic side lighting to emphasize the contrast between the white eyes and black polish. Keep surrounding Halloween props minimal so the manicure remains the main focus. The finished look feels creepy, playful, and bold at the same time. It is especially suitable for anyone who enjoys Halloween nail art that makes people look twice and creates an unforgettable seasonal statement.
Orange Flame Halloween Nails
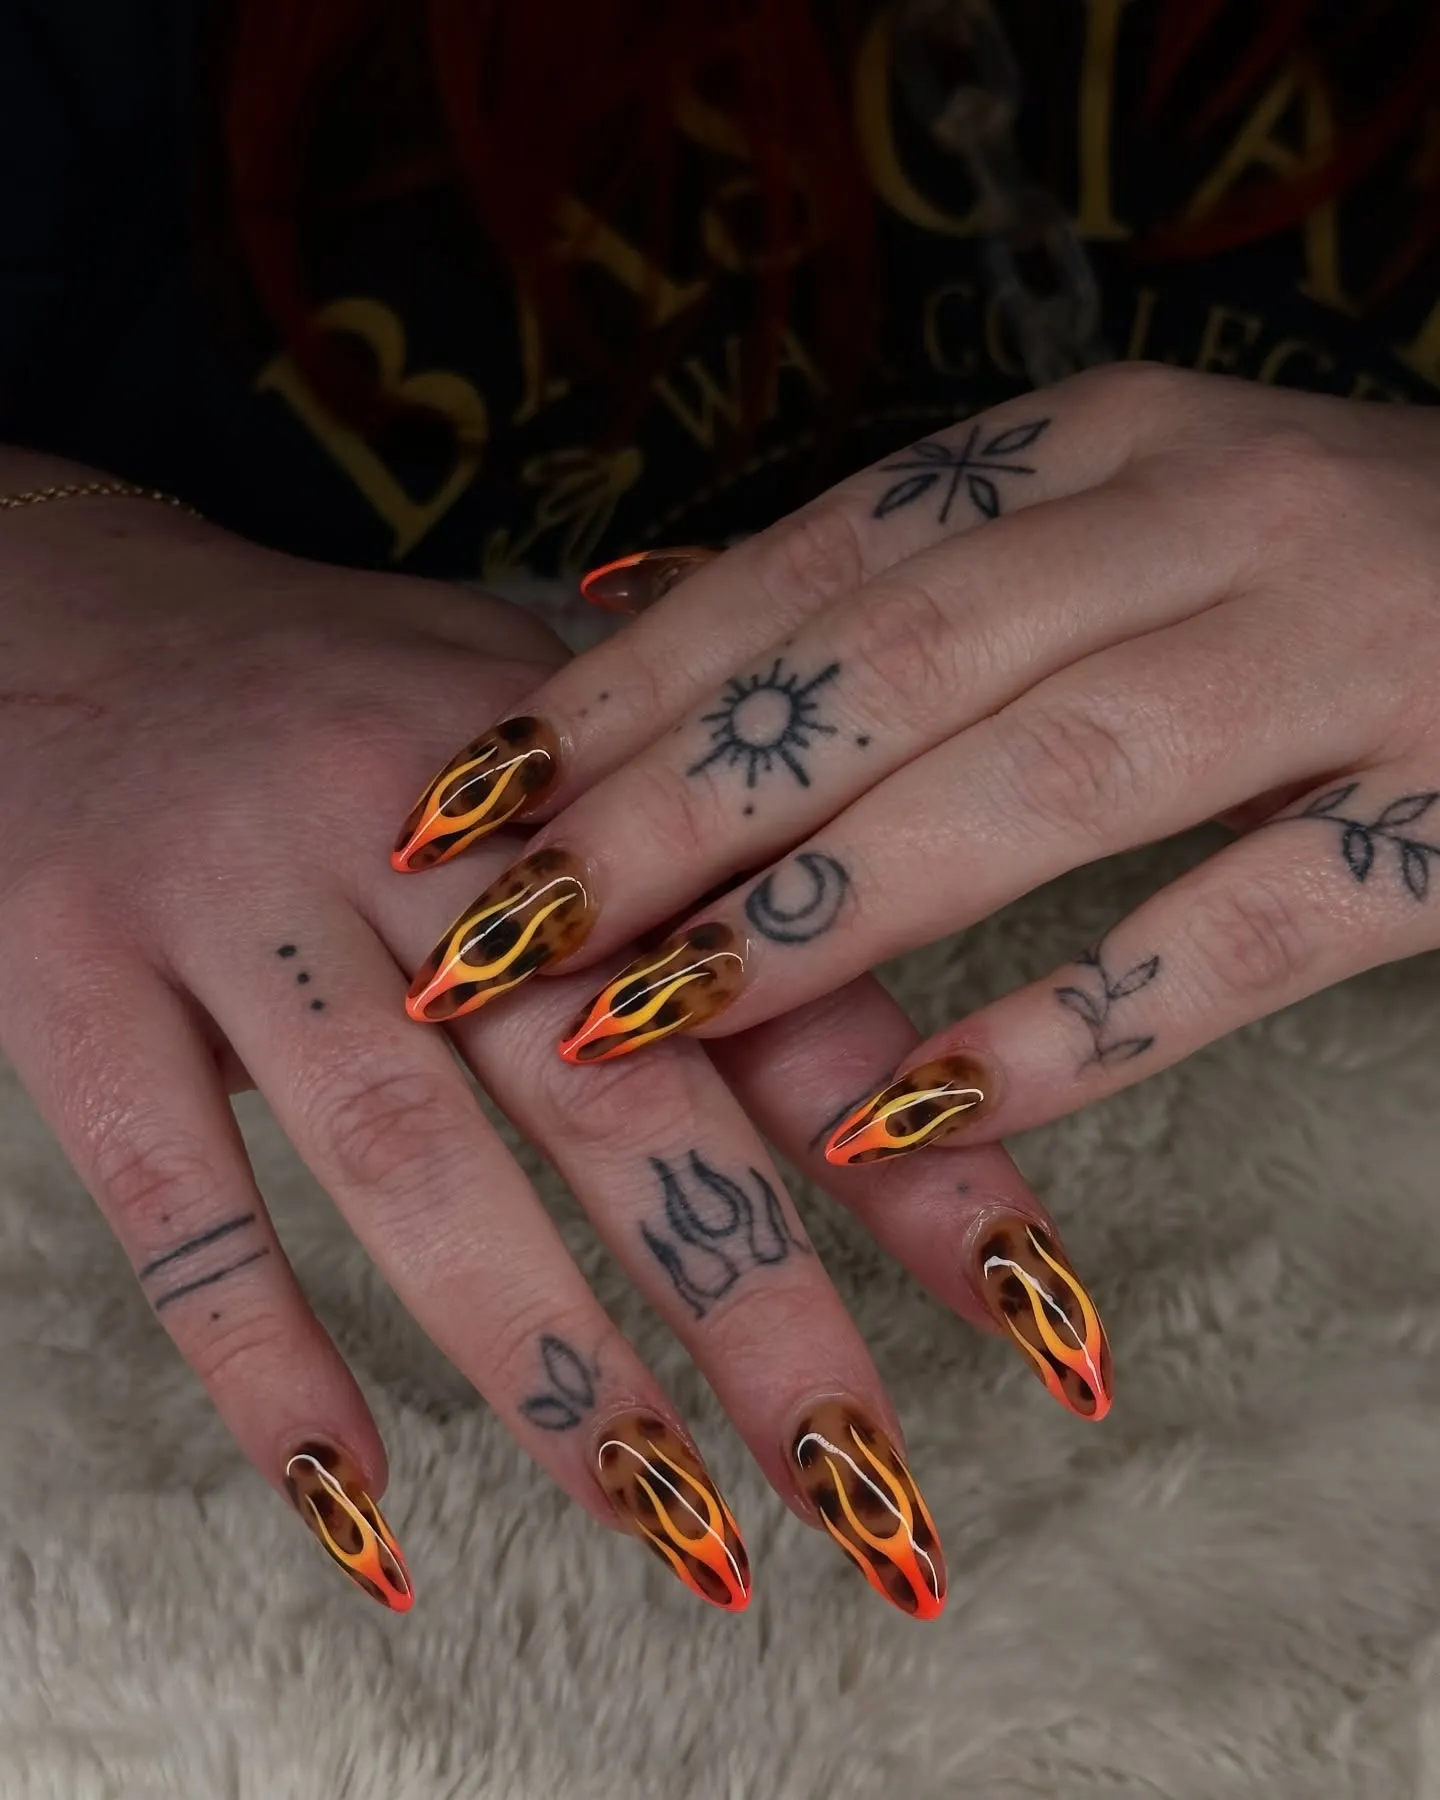
Orange flame nails create a bold Halloween manicure by combining a dark base with bright fiery details. Glossy black polish provides strong contrast, while orange and yellow flames create movement across the nail surface. The flame shapes can begin near the tips and curve upward, creating a dramatic effect that feels energetic without requiring Halloween characters or detailed illustrations. Medium coffin or almond nails give the artwork enough space to flow naturally along the nail. I’ve noticed that using two shades of orange can make flame designs appear more dimensional, especially when a lighter yellow-orange is placed inside the deeper outline. Keep the remaining details clean so the manicure does not become visually crowded. A glossy topcoat helps the colors look vibrant and makes the black base appear deeper. This design works particularly well with edgy Halloween outfits, leather accessories, costume parties, and evening events where bold nails can become part of the overall statement.
- Creates a bold fiery appearance
- Black base adds strong contrast
- Layered colors create visual depth
- Perfect for edgy Halloween outfits
Flame designs can be adjusted to create different levels of intensity. For a softer manicure, use muted orange flames over a dark brown or smoky gray base. For a dramatic version, combine bright orange with yellow highlights and keep the background completely black. The flame tips should vary slightly in height and curve so they look natural rather than repetitive. Medium coffin nails provide a strong canvas, while almond nails can create a more elegant interpretation of the same design. Avoid adding too many extra decorations because the flames already provide enough movement. For Pinterest photography, use warm lighting against a dark background to emphasize the fiery colors. A subtle candle or Halloween prop can reinforce the theme without distracting from the manicure. The final result feels bold, energetic, and slightly rebellious. It is an excellent choice for anyone who wants Halloween nails that stand apart from traditional pumpkins, ghosts, and spiderweb designs.
Spooky Skull Accent Nails
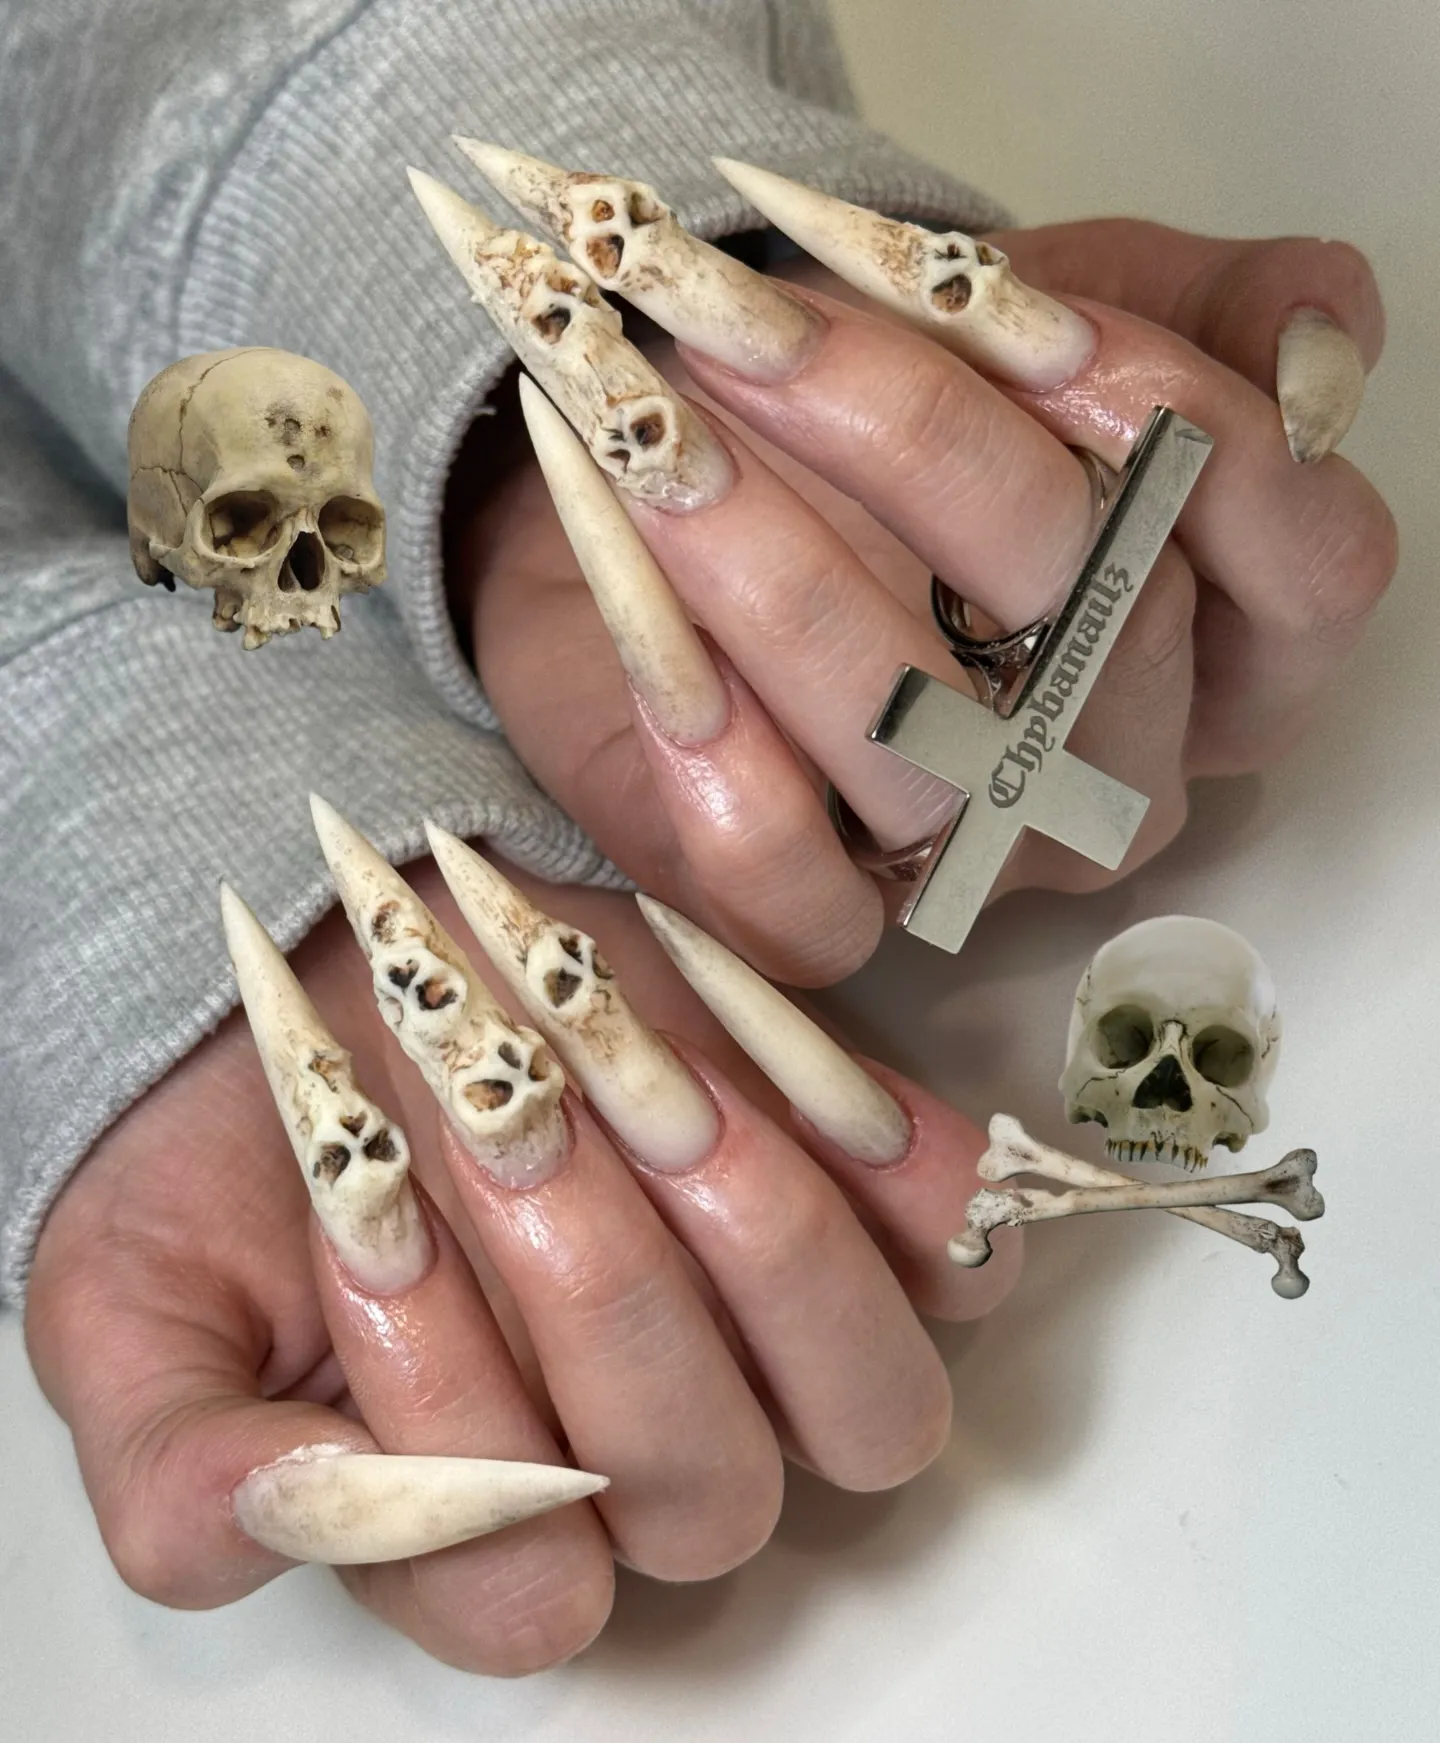
Skull accent nails create a classic Halloween manicure with a strong gothic personality. A glossy black base makes white skull artwork stand out clearly, while small gray or silver details can add dimension without introducing too many colors. You can place one detailed skull on an accent nail or create smaller skull faces across several nails for a more dramatic appearance. Medium coffin and almond shapes provide enough room for the skull features while keeping the overall manicure polished. I’ve noticed that simple skull designs often look better than overly detailed illustrations because the recognizable eyes, nose, and teeth already create a strong visual effect. Keep the remaining nails solid black or deep charcoal to maintain consistency. A glossy finish makes the design look sleek, while a matte base can create a darker gothic mood. This style works especially well for Halloween parties, costume events, gothic outfits, and anyone who prefers bold seasonal nail art.
- Creates a classic gothic appearance
- White artwork contrasts beautifully with black
- Accent nails prevent visual overload
- Works well for costume events
Skull designs can be made cute, creepy, or elegant depending on the facial details. For a minimalist version, use a simple white skull outline with small black eyes and nose. For a more dramatic effect, add tiny teeth, cracks, or silver details around the design. Keep the skull artwork centered and leave enough negative space so the image remains easy to recognize. A dark red accent can also be added to one nail for stronger Halloween contrast, but the black and white combination works beautifully on its own. For photography, use warm candlelight and a dark neutral background to create a gothic atmosphere while keeping the manicure clearly visible. Matte black can make the design feel moodier, while glossy black creates a sharper finish. The completed manicure feels spooky, stylish, and timeless. It is a strong option for anyone who wants recognizable Halloween nail art with a gothic edge and a polished salon-inspired appearance.
Halloween Potion Bottle Nails
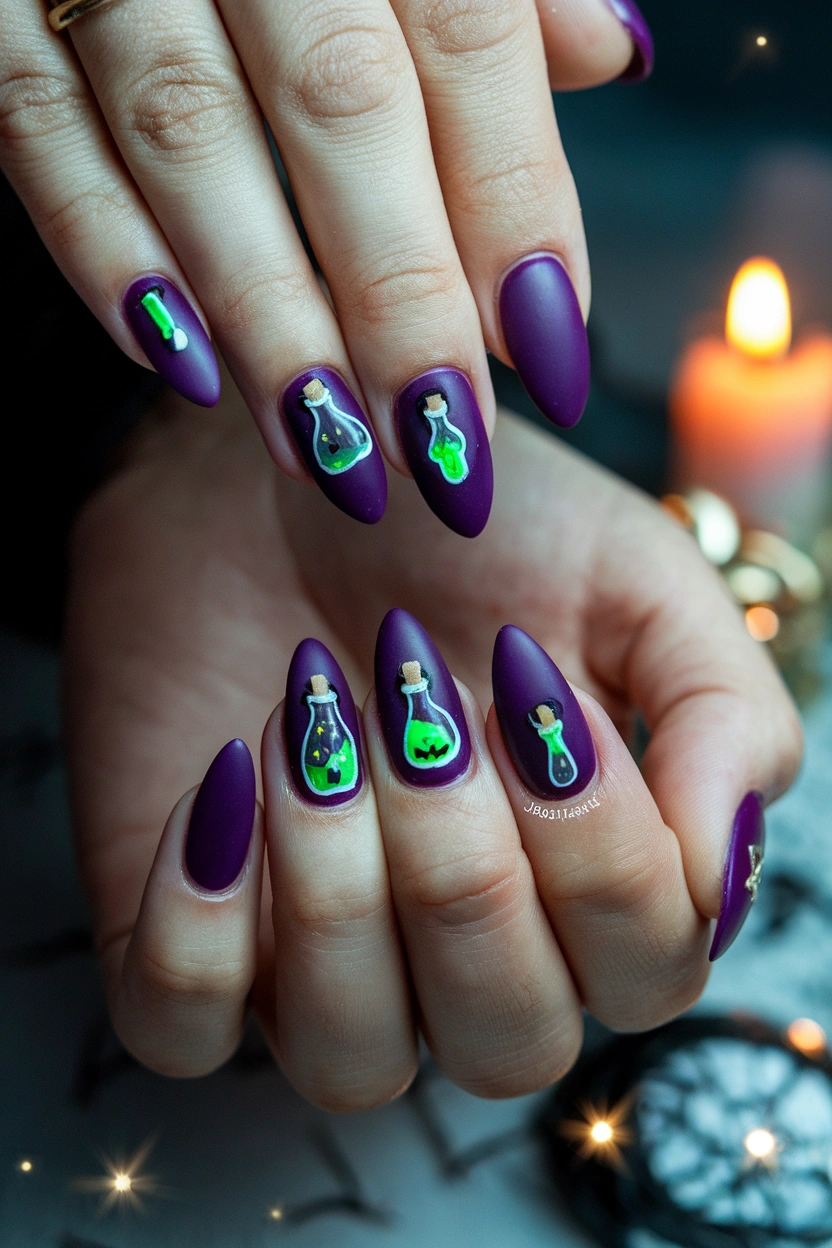
Potion bottle nails create a magical Halloween manicure filled with tiny details and playful color. A deep purple, black, or dark green base provides a mysterious background for small potion bottles filled with glowing green, orange, or purple liquid. Tiny bubbles, stars, labels, and cork details can make the artwork feel more imaginative without covering every nail. Medium almond or oval shapes give enough space for small illustrations while maintaining an elegant silhouette. I’ve noticed that using one main potion color and one accent shade keeps this type of design visually organized. You can place detailed bottles on two or three nails and keep the remaining nails solid for balance. A glossy finish can make the potion colors appear almost illuminated, while tiny metallic accents add a subtle magical effect. This design is perfect for Halloween parties, witch-inspired costumes, fantasy lovers, or anyone who wants seasonal nail art that feels creative, whimsical, and different from traditional spooky patterns.
- Creates a magical Halloween theme
- Small bottles add playful detail
- Deep colors enhance the spooky mood
- Great for witch-inspired styling
Potion bottle designs offer plenty of creative freedom while still keeping the manicure connected to Halloween. Use deep purple or black as the main base, then choose one bright liquid color such as green, orange, or electric purple for contrast. Tiny bubbles can be added around the bottle to create a glowing effect, while small stars or crescent moons can fill empty areas without making the nails too crowded. Keep the illustrations simple enough that the bottle shape remains recognizable. For a more elegant look, use metallic gold for tiny labels or bottle caps instead of adding many bright colors. Soft candlelight and dark backgrounds work beautifully for photographs because they emphasize the magical atmosphere. The finished manicure feels mysterious, playful, and imaginative. It is especially suitable for anyone who loves witchy aesthetics, fantasy-inspired Halloween looks, or detailed nail art that tells a visual story without becoming overly complicated.
Haunted House Nail Design
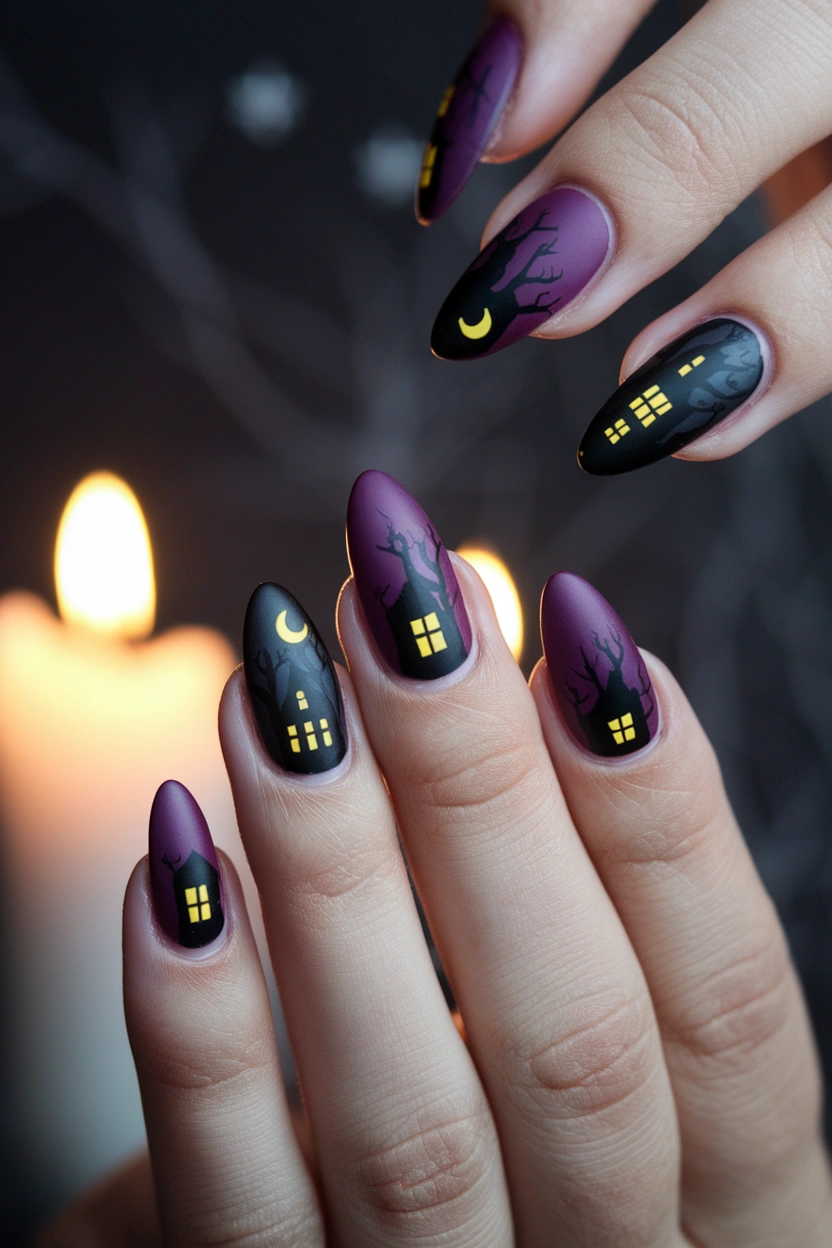
Haunted house nails turn the manicure into a tiny Halloween night scene. A deep black, navy, or purple base creates the dark sky, while a small haunted house silhouette becomes the main focal point. Tiny yellow windows can add a glowing effect, while a crescent moon, bare tree branches, or small stars help complete the scene. Medium almond or oval nails provide enough space for the artwork without making the manicure feel too crowded. I’ve noticed that detailed scenery looks most effective when limited to one or two accent nails, while the remaining nails use solid dark colors or simple stars. A glossy finish gives the background depth and helps the small details stand out. This design works beautifully for Halloween parties, spooky movie nights, costume events, and anyone who enjoys atmospheric nail art. It feels more like a miniature illustration than a traditional manicure, making it an especially memorable choice for the Halloween season.
- Creates a miniature spooky scene
- Glowing windows add visual interest
- Accent nails keep the artwork balanced
- Perfect for atmospheric Halloween styling
A haunted house manicure works best when the scene remains simple enough to recognize at a small scale. Start with a dark purple, navy, or black base and create the house using black or very dark gray. Tiny yellow windows provide contrast and make the building appear illuminated against the nighttime background. A crescent moon can sit above the house, while thin tree branches or a few stars can fill surrounding space. Keep most nails free from detailed scenery so the accent nail remains visually important. For a more gothic version, use silver details instead of yellow and add deeper red accents sparingly. Soft candlelight or low warm lighting can make the finished manicure look especially atmospheric in photographs. The final result feels mysterious, artistic, and distinctly Halloween-inspired. It is ideal for anyone who prefers storytelling nail art and wants a design that captures the eerie feeling of a quiet haunted night rather than relying on simple Halloween symbols alone.
Witch Hat Accent Nails
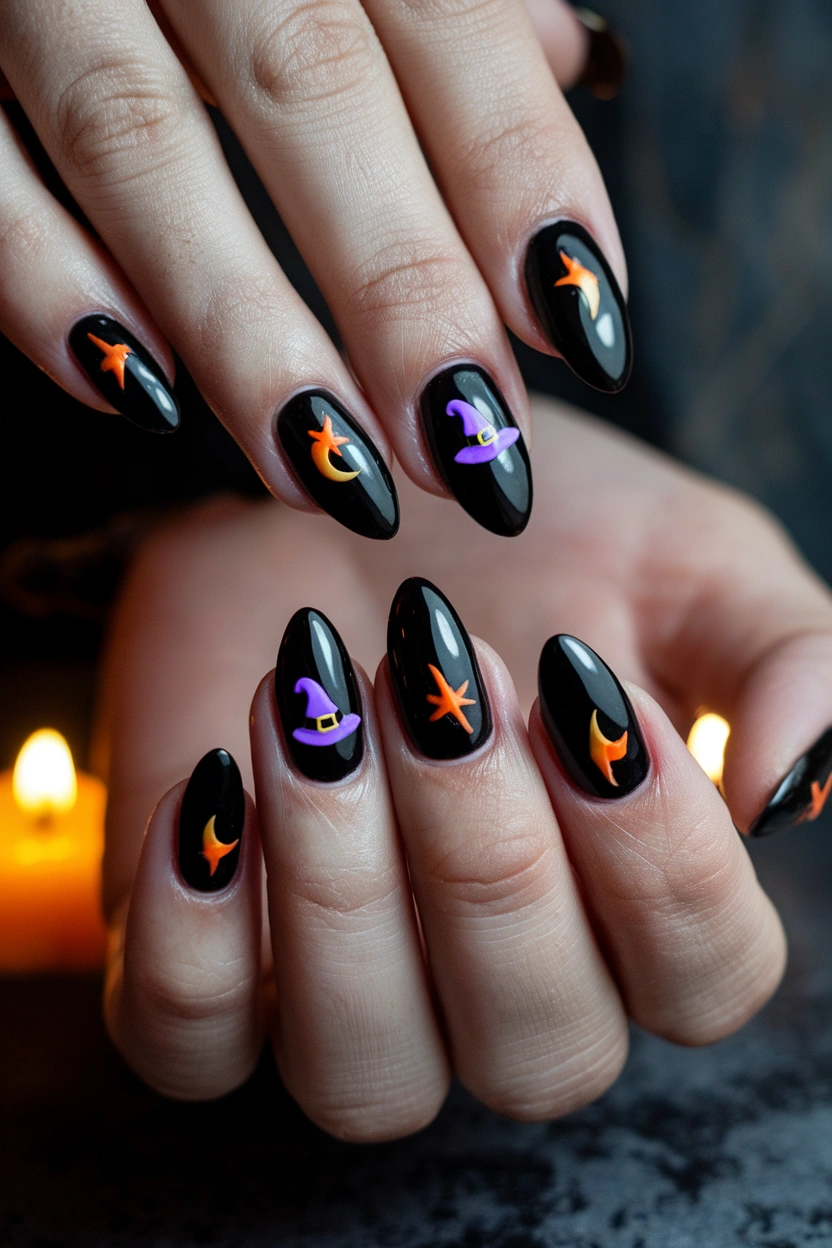
Witch hat nails bring a playful magical feeling to Halloween manicures without requiring complicated artwork across every nail. A glossy black or deep purple base creates a dramatic background, while tiny pointed witch hats add an instantly recognizable seasonal detail. You can decorate the hats with orange bands, small stars, or tiny gold buckles for extra character. Medium almond or oval nails work especially well because they provide enough room for the hat illustrations while maintaining an elegant silhouette. I’ve noticed that keeping the artwork limited to two or three accent nails makes the manicure look more polished and wearable. The remaining nails can stay solid or feature tiny stars and moons for consistency. A glossy topcoat helps the colors appear brighter and gives the finished manicure a salon-like appearance. This design works beautifully with witch costumes, gothic outfits, Halloween parties, and anyone who wants cute seasonal nails with a little magical personality.
- Creates a playful witchy appearance
- Works beautifully with dark bases
- Accent nails keep the design balanced
- Easy to personalize with stars
Witch hat designs can be styled in several ways depending on the look you want. For a cute manicure, use purple hats with orange bands and tiny yellow stars. For something more sophisticated, keep the hats black and add small metallic gold details. A deep plum or midnight blue base can also create a softer alternative to traditional black polish. Keep the illustrations relatively small so the nails remain visually clean and elegant. You can add tiny moons, stars, or sparkles to the surrounding nails without making the design feel crowded. For Pinterest photography, use warm candlelight and a dark neutral background to emphasize the magical Halloween atmosphere. A small witch hat prop or dark purple fabric can provide subtle context without distracting from the manicure. The finished look feels whimsical, mysterious, and festive while remaining wearable. It is especially suitable for anyone who enjoys witch-inspired Halloween aesthetics but prefers cute details over scary or graphic nail art.
Black Lace Spider Nails
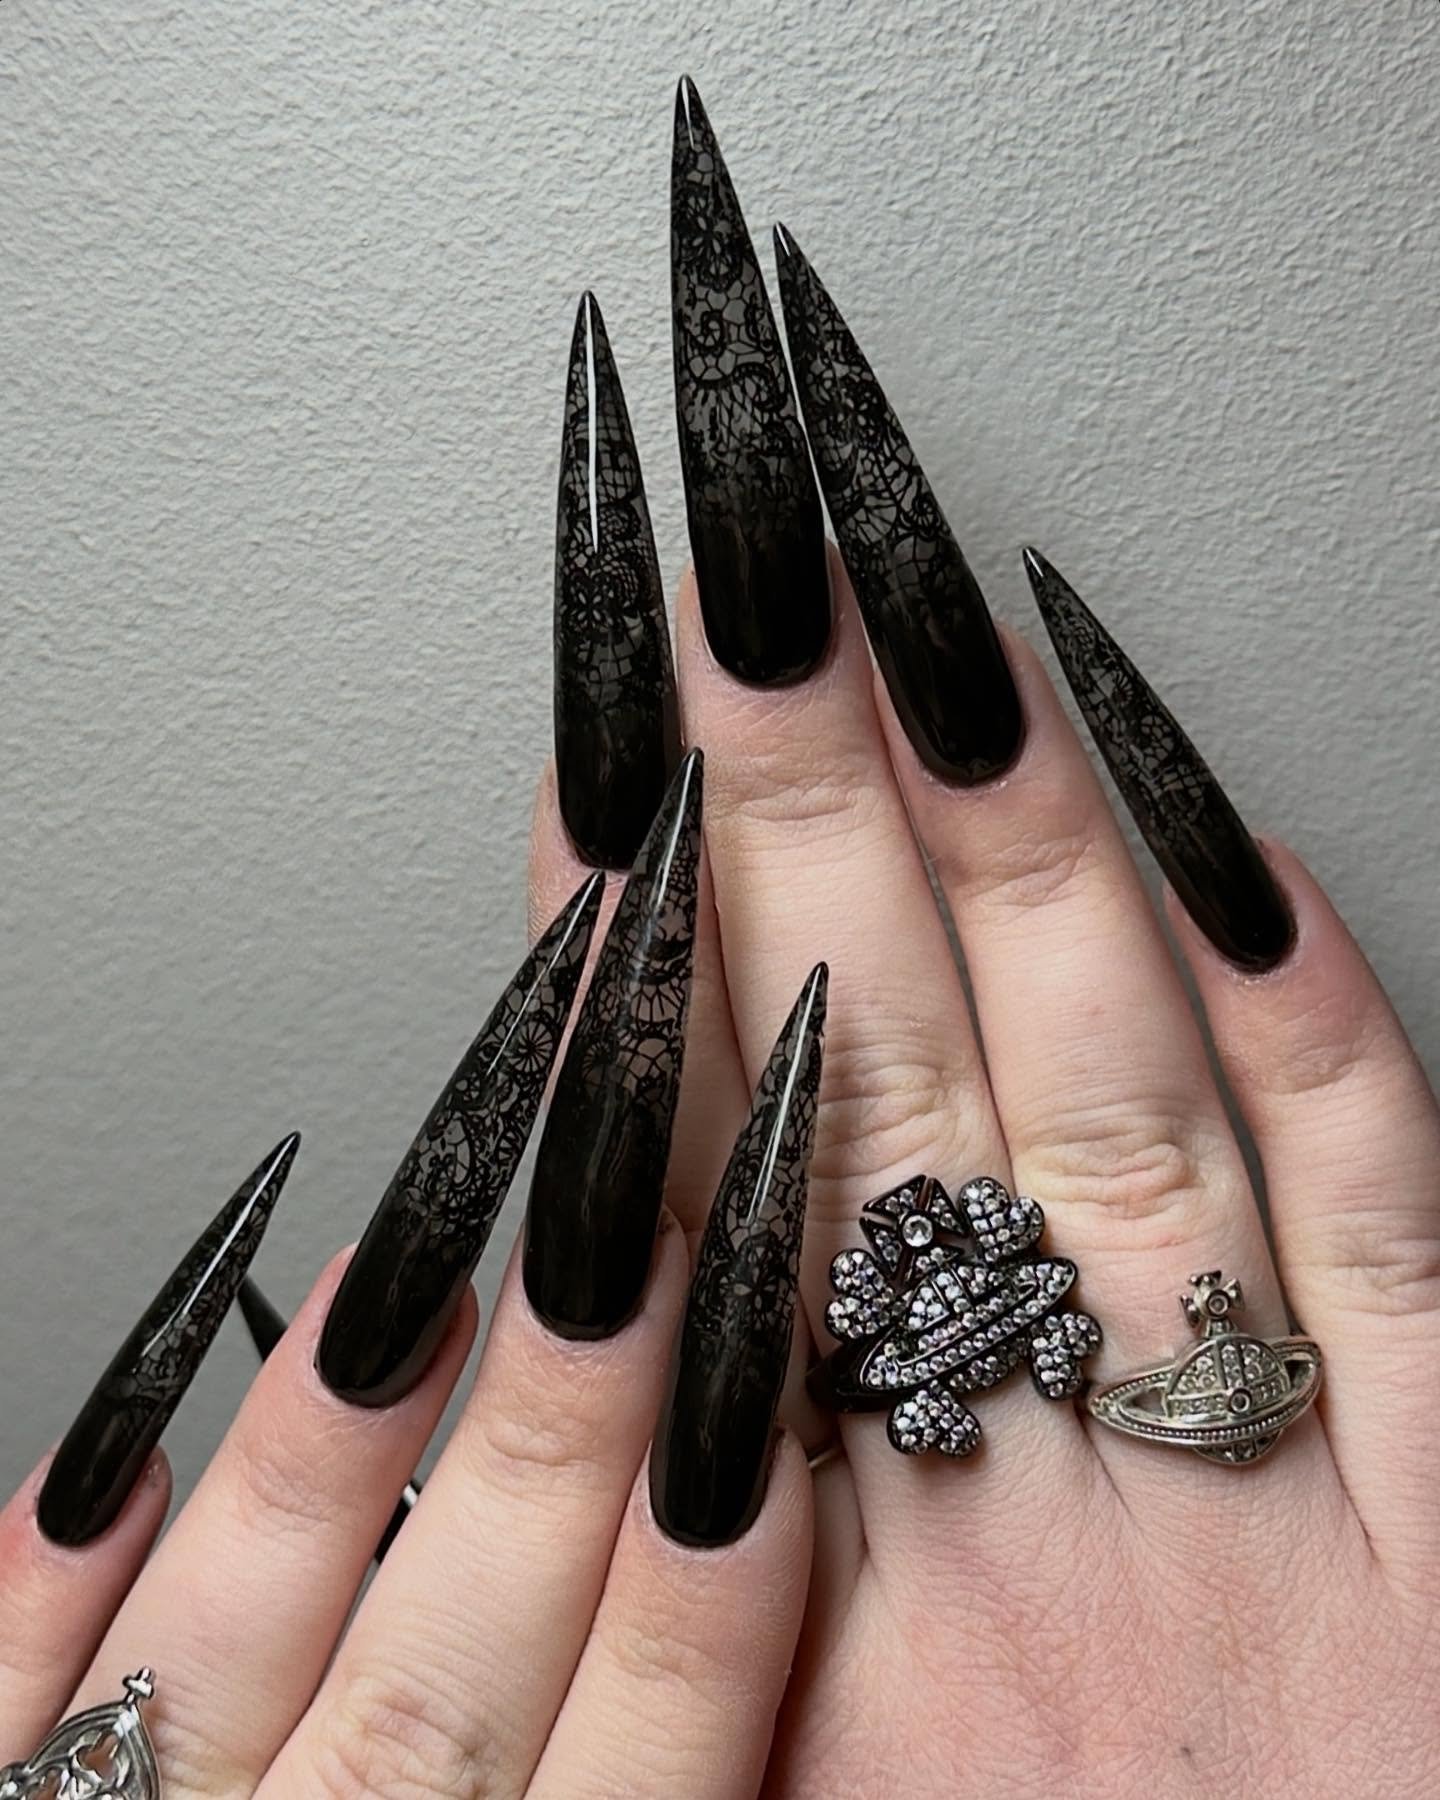
Black lace spider nails create a sophisticated Halloween manicure by combining delicate web patterns with dark, elegant colors. A sheer nude, deep burgundy, or black base can provide the foundation, while fine spiderweb lines create a lace-like effect across selected nails. Tiny silver or black spider details can add a recognizable Halloween element without making the manicure look childish. Medium almond and oval shapes work particularly well because their elongated silhouette complements delicate linework. I’ve noticed that thin web patterns look more refined when they are concentrated near one corner or along the edge instead of covering the entire nail. You can keep several nails completely solid to create contrast and prevent the design from becoming too busy. A glossy topcoat enhances the clean lines and gives the manicure a polished appearance. This style is especially suited to gothic outfits, Halloween dinners, evening parties, and anyone who wants spooky nail art with an elegant and slightly dramatic character.
- Combines spooky details with elegance
- Fine webs resemble delicate lace
- Silver spiders add subtle contrast
- Perfect for gothic-inspired outfits
The lace effect becomes more convincing when the spiderweb lines are thin and evenly spaced. Start with a deep base color such as burgundy, black, smoky gray, or sheer nude, then create a few curved lines connected by delicate horizontal sections. Avoid making every nail identical because varying the placement creates a more natural artistic composition. A tiny spider charm or hand-painted spider can be placed on one accent nail for a subtle Halloween statement. For a softer appearance, use silver or charcoal web lines instead of pure black. Dark velvet, satin, or neutral backgrounds work beautifully for photographs because they reinforce the elegant gothic mood. Keep jewelry simple so the nail details remain visible. The final manicure feels sophisticated, mysterious, and festive without relying on bright colors or cartoon-style artwork. It is a beautiful option for someone who wants Halloween-inspired nails that can also complement evening clothing and more refined seasonal styling.
Spooky Mummy Wrap Nails
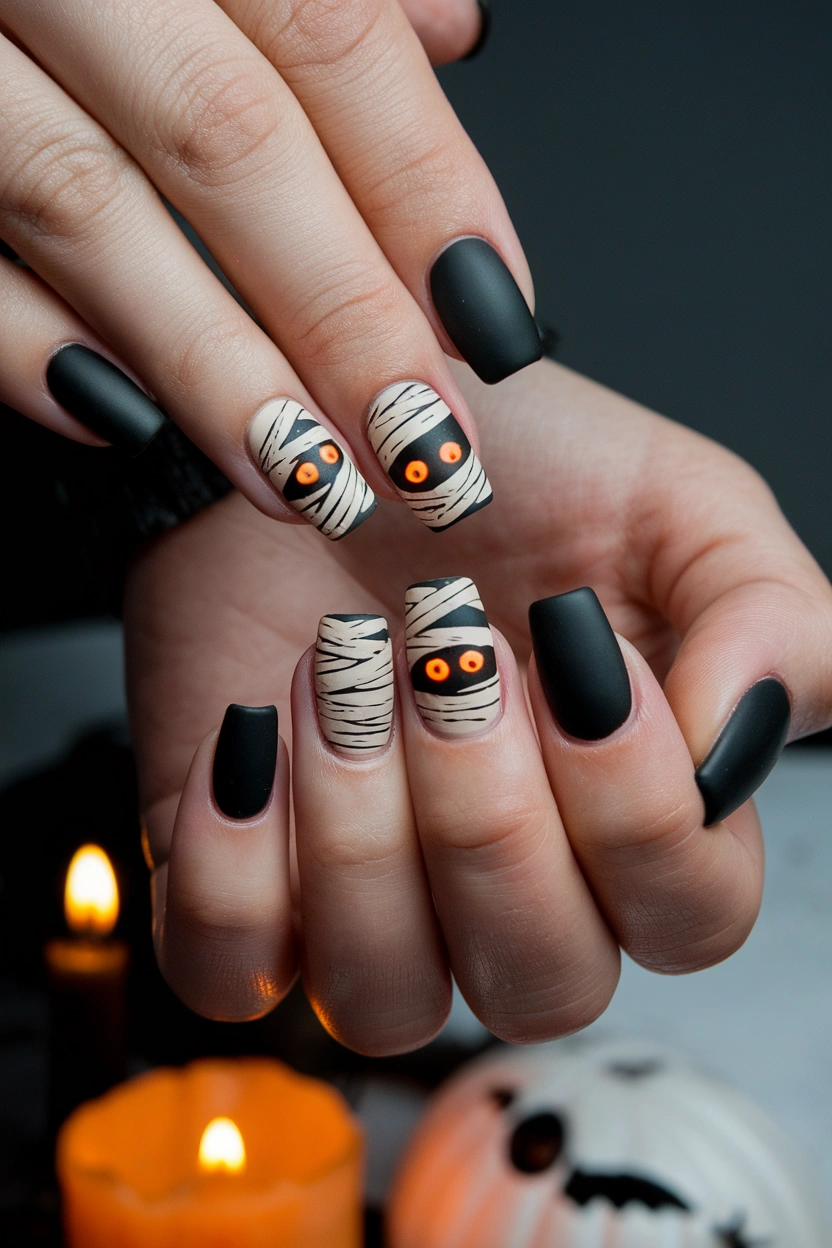
Mummy wrap nails create a fun Halloween manicure using simple lines and contrasting colors. A beige, cream, or muted gray base can represent the mummy wrapping, while thin black lines create the layered bandage effect. Tiny glowing orange or black eyes can add a playful spooky expression without requiring detailed artwork. Medium coffin, square, or rounded nails provide enough space for the wrap pattern to remain visible and organized. I’ve noticed this design looks especially effective when the bandage lines vary slightly in direction rather than running perfectly straight across every nail. You can place mummy faces on one or two accent nails and keep the remaining nails covered with simple wrap details. A matte finish works beautifully for the fabric-like appearance, while glossy eyes provide a small contrast. This manicure is perfect for Halloween parties, costume events, trick-or-treating, or anyone who prefers cute spooky designs that are easy to recognize and fun without becoming overly dramatic.
- Creates a cute spooky character
- Simple lines make it approachable
- Matte polish enhances the wrap effect
- Orange eyes add playful contrast
Mummy nails are easy to customize because the main design relies on simple lines rather than complicated illustrations. Start with a creamy beige or pale gray base, then use black or dark brown polish to draw irregular horizontal and diagonal bands. Keep the lines slightly uneven to create the appearance of wrapped fabric. On one or two nails, leave a small space between the bandages and add two tiny eyes underneath. Orange eyes create a traditional Halloween glow, while black eyes create a softer cartoon-like appearance. A matte topcoat can make the base look more fabric-like, while glossy eyes provide contrast. For photographs, use warm candlelight and dark backgrounds to emphasize the spooky atmosphere. Small Halloween props can be placed nearby, but keep the composition simple. The finished manicure feels playful, cozy, and seasonal. It is a great choice for anyone who wants recognizable Halloween nail art that feels cute rather than frightening or overly complicated.
Haunted Pumpkin Faces
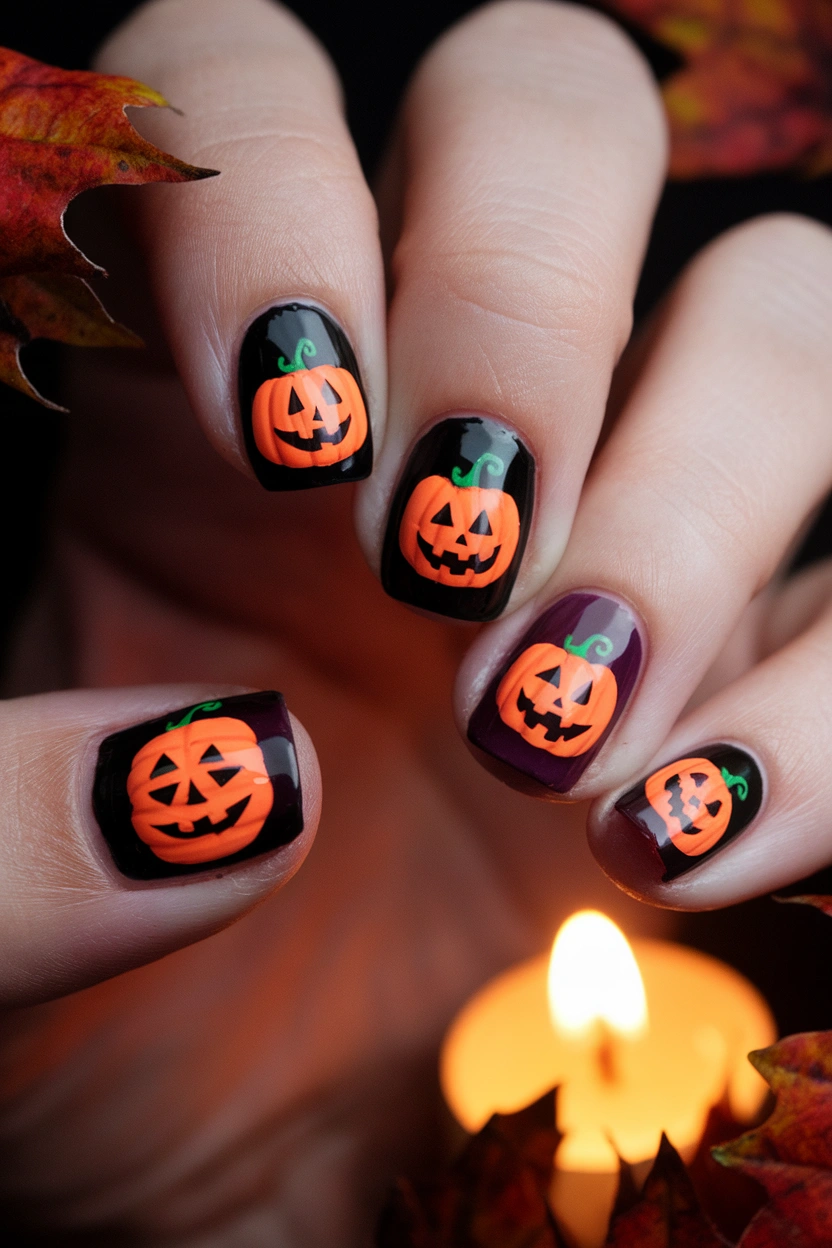
Haunted pumpkin faces create a cheerful Halloween manicure while keeping the classic pumpkin theme front and center. Bright orange polish provides a warm seasonal base, while tiny black facial expressions transform the nails into miniature jack-o’-lanterns. You can use different expressions on each pumpkin, including simple smiles, surprised eyes, or slightly spooky faces. Alternating black or deep purple nails can provide contrast and prevent the manicure from looking too bright. Medium rounded, oval, or almond shapes all work well because the pumpkin faces remain recognizable without needing a large canvas. I’ve noticed that simple facial features usually look cleaner than highly detailed expressions, especially when working on smaller nails. A tiny green stem can be added near the cuticle for an extra realistic touch. This manicure is perfect for Halloween parties, pumpkin-carving nights, costume events, and anyone who enjoys colorful seasonal nail art. It feels playful, festive, and easy to personalize for different Halloween moods.
- Uses classic pumpkin colors
- Facial expressions add personality
- Dark accent nails create contrast
- Easy to customize for different moods
Pumpkin faces can range from adorable to spooky depending on the expressions you choose. For a cute version, use rounded eyes and a small smiling mouth. For a more traditional jack-o’-lantern appearance, create triangular eyes and a jagged mouth. Keep the orange base smooth and evenly applied so the black facial details remain clear. Alternating the pumpkin nails with solid black, brown, or purple nails can create a more balanced composition. Tiny green stems or small gold stars can provide additional detail without overwhelming the manicure. For Pinterest photography, use warm lighting and place a few autumn leaves or miniature pumpkins around the hand while keeping the background uncluttered. A glossy topcoat can make the orange shade appear brighter and more polished. The finished design feels cheerful, recognizable, and festive. It is especially suitable for anyone who wants Halloween nails that capture the playful side of the season rather than focusing entirely on dark or gothic imagery.
Gothic Red French Tips
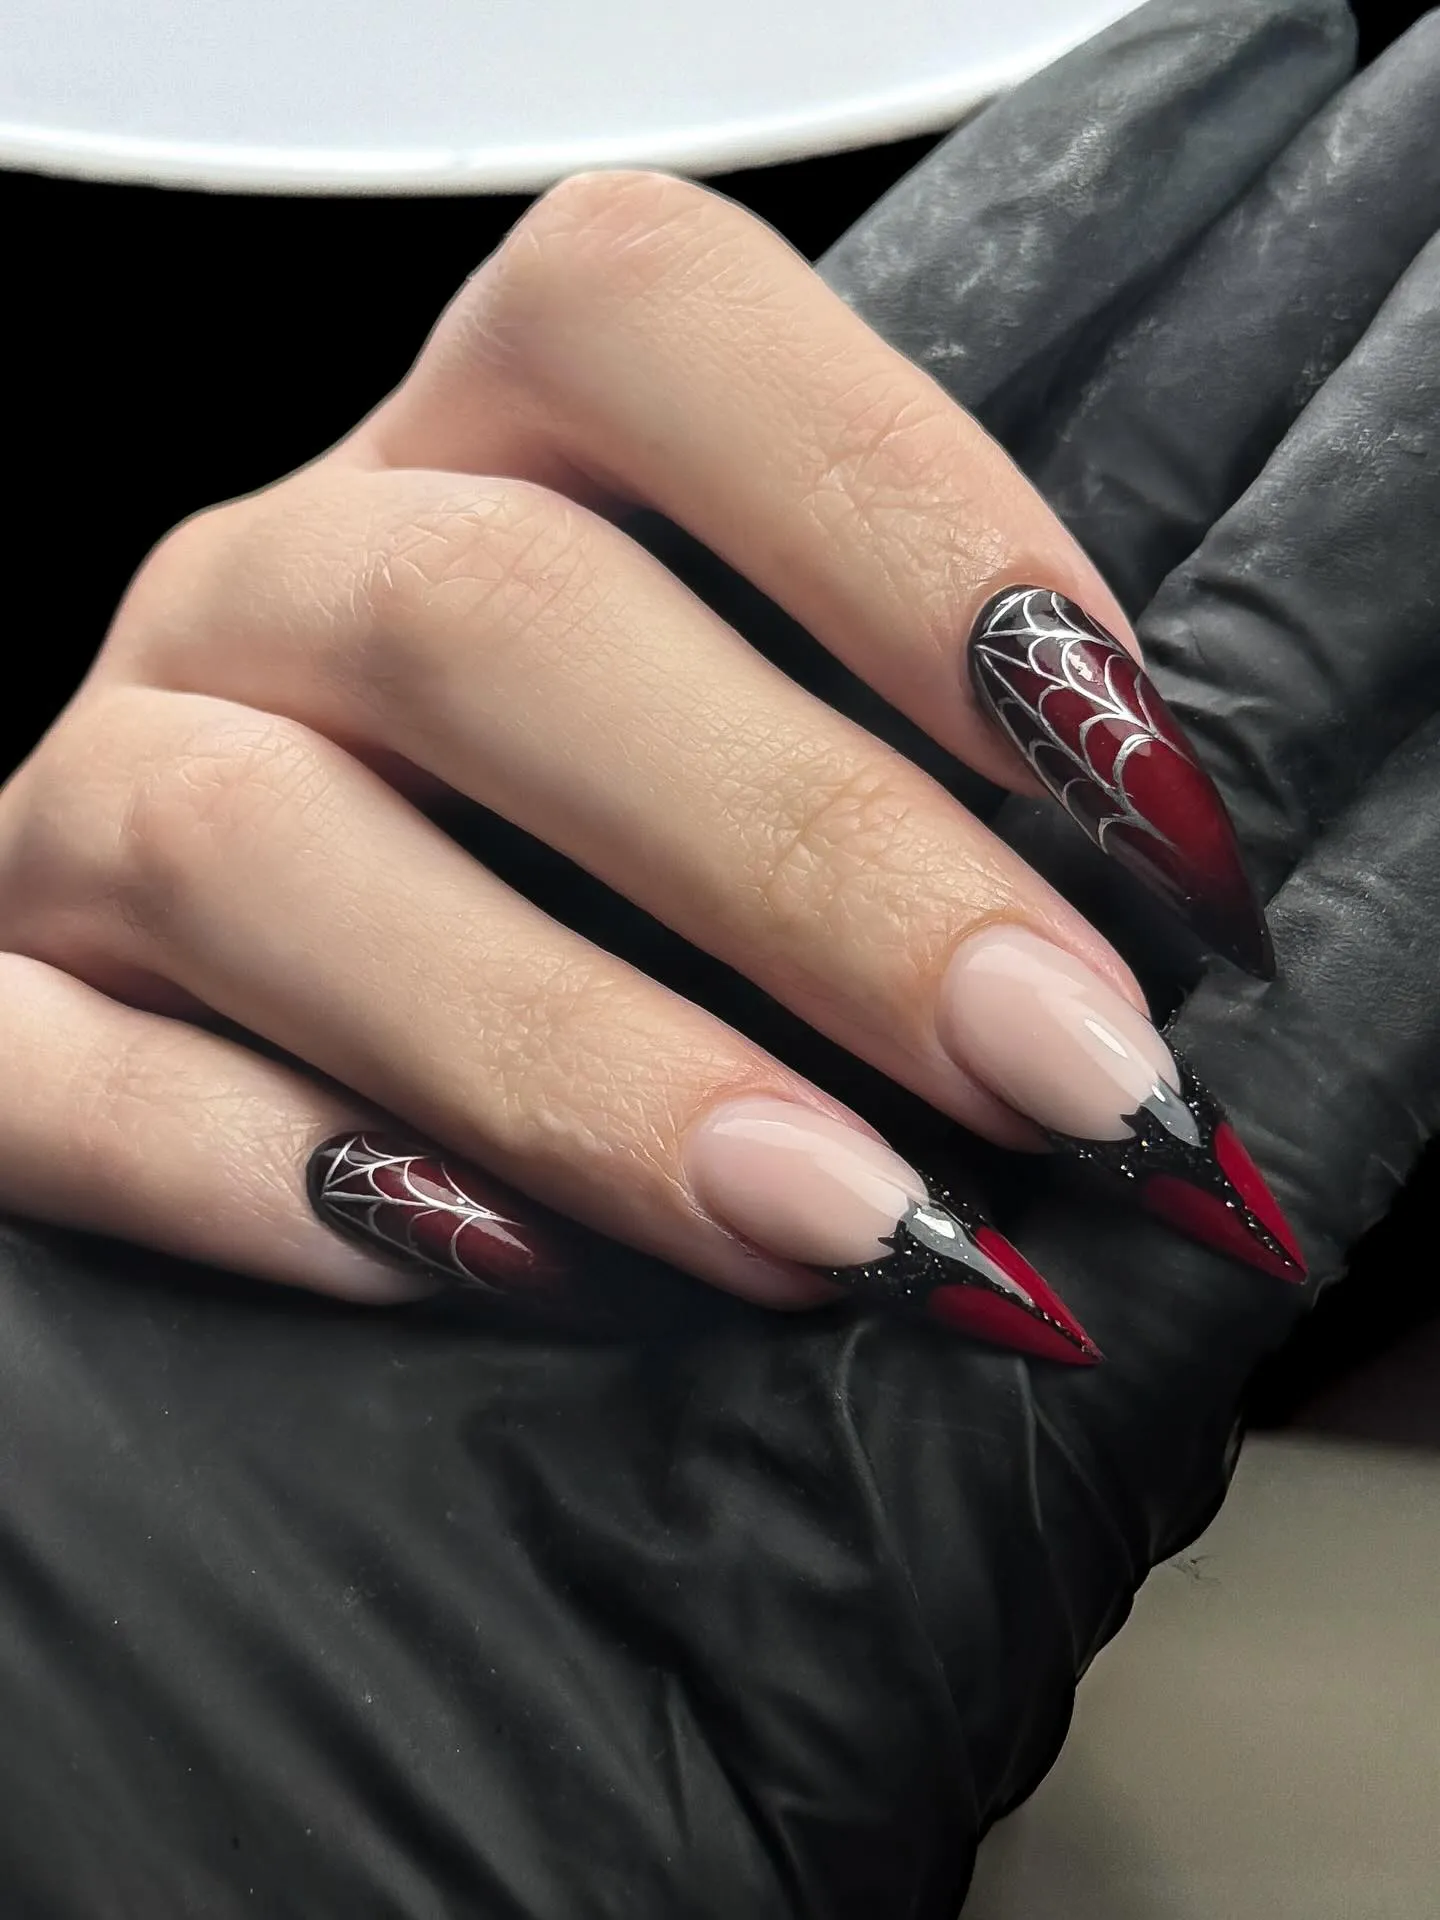
Gothic red French tips create a sophisticated Halloween manicure by combining a classic French structure with a darker seasonal color. A sheer nude or pale beige base keeps the nails clean and elegant, while deep red tips add dramatic contrast. The red can range from wine to blood-inspired tones depending on how intense you want the finished look. Medium almond or coffin shapes work particularly well because their length gives the French tip a graceful appearance. I’ve noticed that a thin red tip often looks more refined than a thick one, especially when paired with a glossy finish. You can keep the manicure completely simple or add tiny black moons, dots, or delicate lines to one or two accent nails. The design works beautifully with gothic outfits, black dresses, Halloween parties, and evening events. It offers a seasonal appearance without using obvious pumpkins, ghosts, or cartoon characters, making it ideal for anyone who prefers elegant Halloween-inspired nail styling.
- Gives French tips a gothic twist
- Deep red adds seasonal drama
- Sheer base keeps it elegant
- Works beautifully for evening events
The beauty of gothic French tips comes from their simplicity. The sheer base creates a clean canvas while the dark red tips provide enough contrast to make the manicure feel distinctly different from a traditional French design. Choose a wine-red polish for a sophisticated appearance or a brighter deep red when you want stronger Halloween energy. Keep the tip line smooth and consistent so the manicure looks professionally finished. If you want extra detail, add one tiny black crescent or small metallic accent rather than covering the nails with elaborate artwork. For photography, dark velvet, soft candlelight, and neutral backgrounds can emphasize the gothic character while keeping the red visible. A glossy topcoat gives the entire manicure a sleek finish. The final result feels elegant, dramatic, and subtly spooky. It is a versatile choice for Halloween dinners, parties, costume events, or anyone who wants seasonal nails that remain sophisticated enough to wear with formal and everyday outfits.
Creepy Graveyard Nails
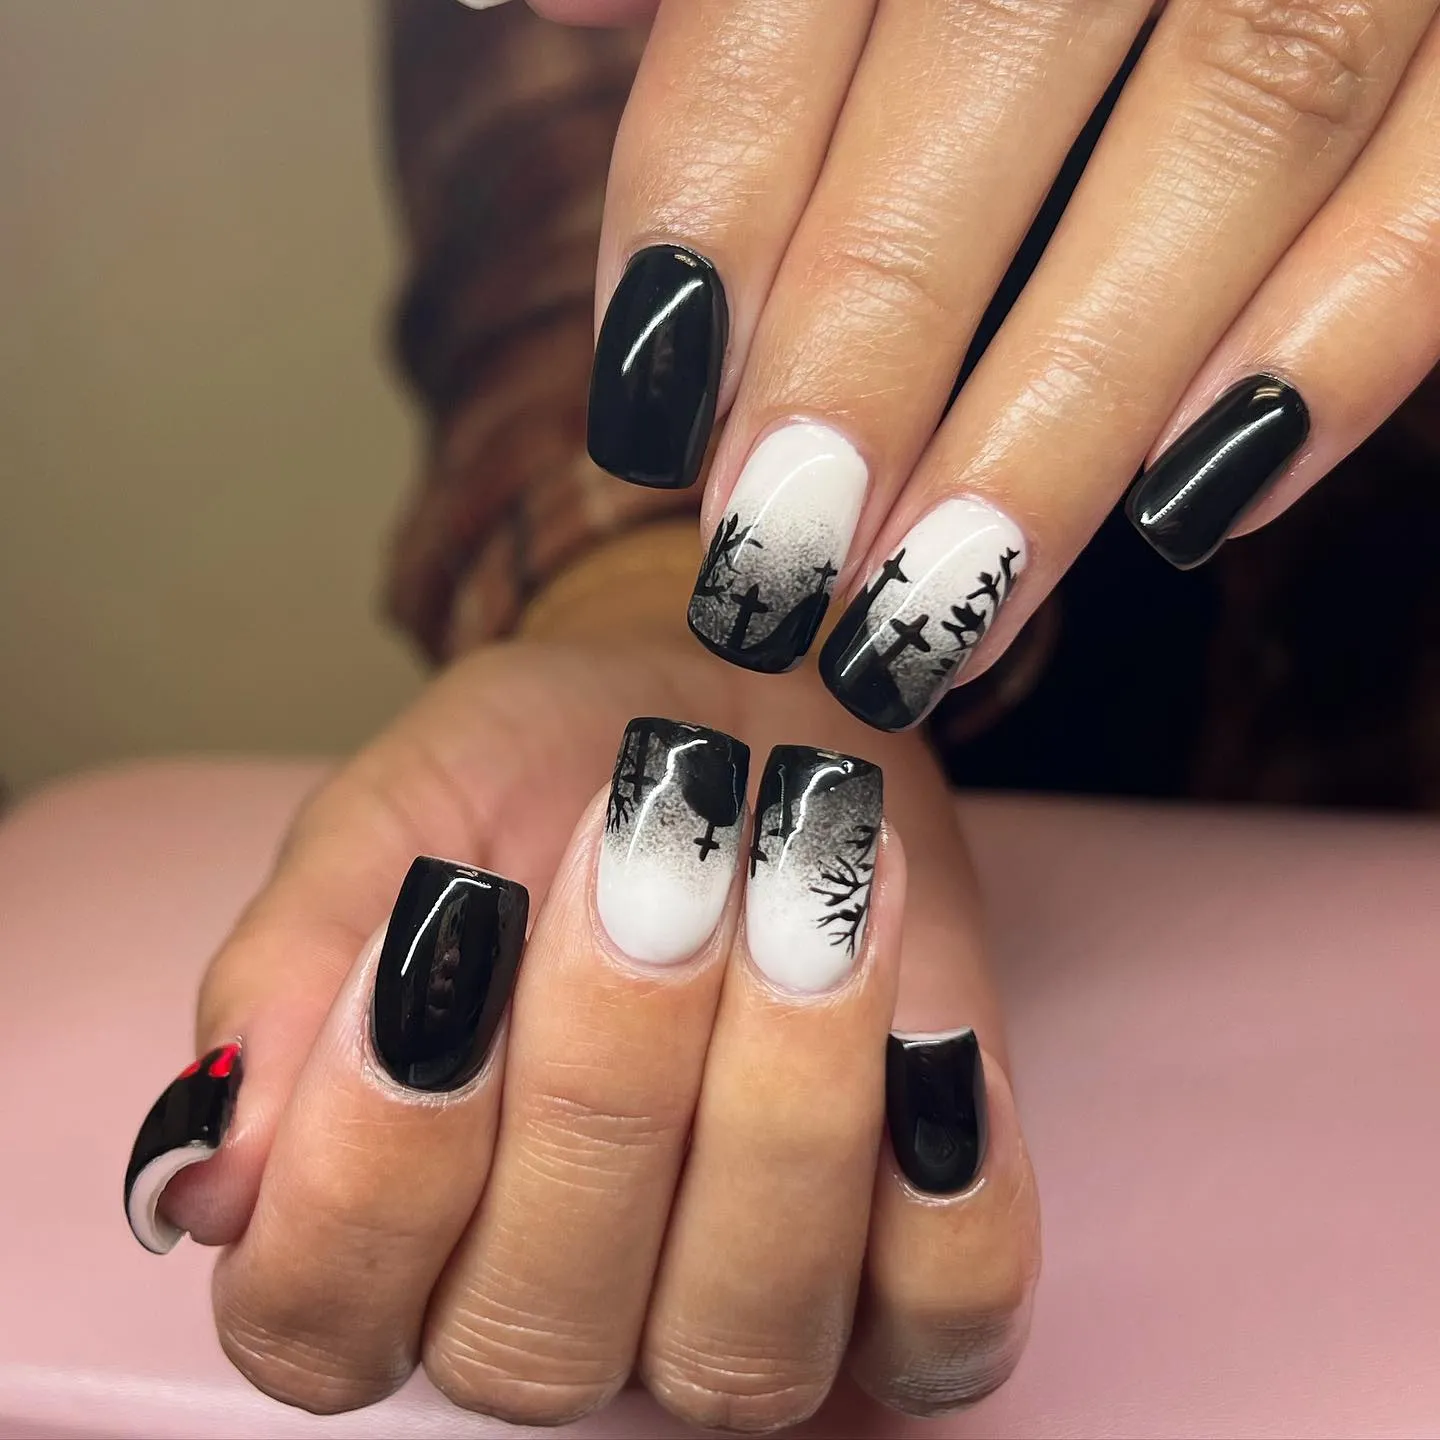
Graveyard nails turn the manicure into a miniature Halloween scene filled with dark silhouettes and atmospheric details. A deep navy, black, or smoky purple base creates the nighttime background, while tiny tombstones, bare trees, and cemetery gates form the main artwork. A glowing orange or pale yellow moon can add contrast and make the scene feel more dramatic. Medium almond or oval nails provide enough room for small landscape details while keeping the manicure elegant. I’ve noticed that graveyard scenes look better when the artwork is limited to two or three accent nails rather than repeated across every finger. The remaining nails can feature simple stars, moons, or solid dark polish. A glossy finish adds depth to the nighttime background, while small metallic details can create subtle highlights. This design is ideal for Halloween parties, spooky movie nights, gothic outfits, and anyone who enjoys detailed seasonal nail art inspired by eerie nighttime scenery.
- Creates an atmospheric Halloween scene
- Dark colors enhance the spooky mood
- Accent nails prevent visual overload
- Perfect for gothic-inspired styling
Graveyard nail art works best when the background remains dark and the main silhouettes are kept simple. Start with navy, black, or deep purple polish, then add small gray or black tombstones and thin tree branches. A crescent or full moon can sit behind the silhouettes to create depth, while tiny stars fill empty spaces. If you want a warmer Halloween palette, use a small orange moon or subtle amber windows in the background. Keep the details concentrated on selected nails so the manicure remains balanced and wearable. For photography, soft candlelight and dark neutral surfaces can strengthen the mysterious atmosphere. A slight glossy finish helps the darker colors appear richer and makes small details easier to see. The final result feels eerie, artistic, and atmospheric without becoming overly graphic. It is especially suitable for anyone who loves Halloween scenery, gothic aesthetics, and nail designs that create the feeling of a quiet spooky night.
Vampire Bite Nail Art
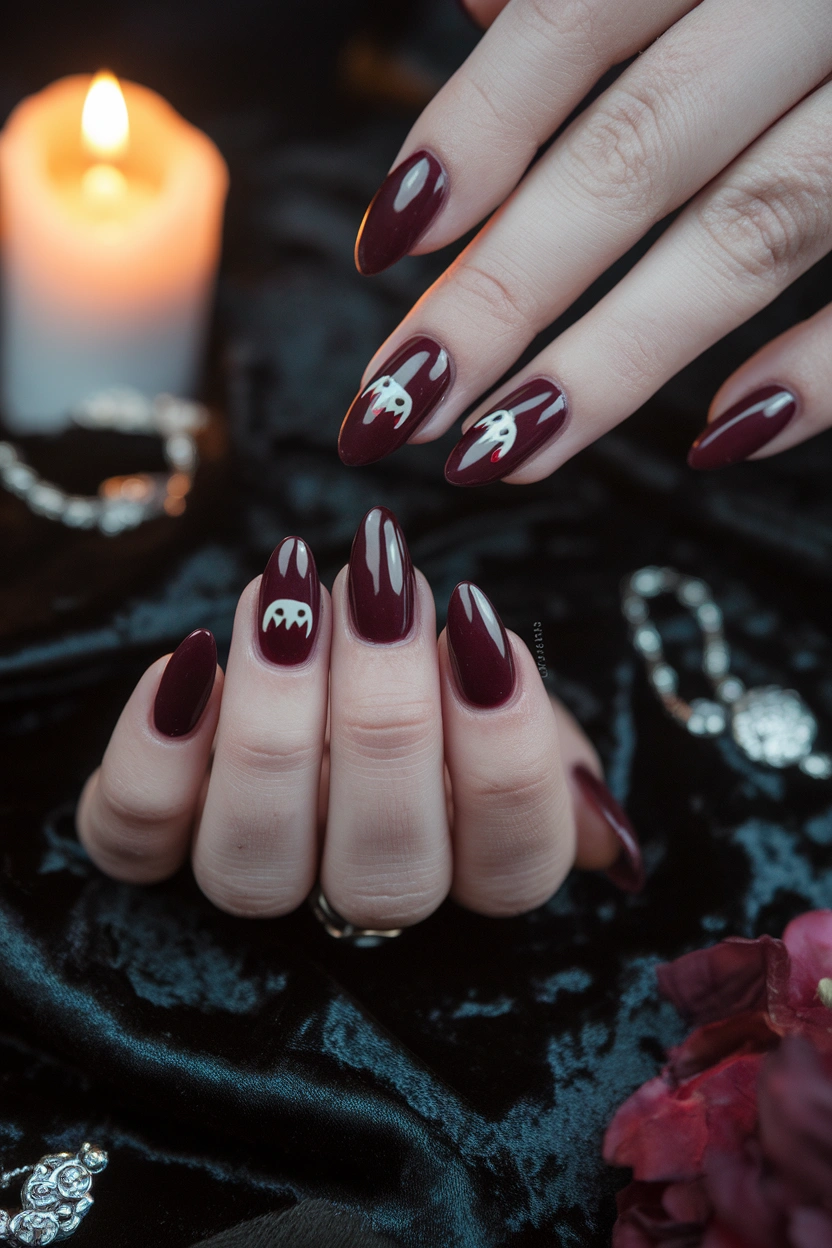
Vampire bite nails create a subtle gothic Halloween manicure without relying on complicated illustrations. Deep burgundy, black, or dark red polish creates a dramatic foundation, while tiny fang marks and small red details suggest a vampire bite. The design can be placed on one or two accent nails so the manicure remains sophisticated rather than overly graphic. Medium almond or oval shapes work especially well because their elegant silhouette complements the darker color palette. I’ve noticed that using deep wine tones instead of bright red can make vampire-inspired nails feel more polished and wearable. You can add tiny silver details, subtle black lines, or a glossy finish to strengthen the gothic character. This style works beautifully with black outfits, burgundy clothing, velvet textures, and evening accessories. It is especially suited to Halloween parties, costume events, gothic fashion, or anyone who wants seasonal nail art with a darker and more sophisticated personality rather than a cute or colorful appearance.
- Creates a subtle vampire theme
- Deep burgundy adds gothic elegance
- Accent details keep it sophisticated
- Works beautifully with dark outfits
Vampire bite details can be kept extremely simple while still being recognizable. Start with a deep burgundy or black base, then create two tiny white or pale fang marks on one accent nail. Add a very small red detail underneath to suggest the bite without making the design overly graphic. For a softer interpretation, use silver or muted pink instead of bright red. Keep the rest of the nails solid so the accent remains visually important. A high-shine topcoat can make the dark colors appear richer and create a sleek finish, while a matte surface gives the manicure a more modern gothic mood. For Pinterest photography, use black velvet, warm candlelight, and minimal silver jewelry to reinforce the elegant vampire-inspired atmosphere. The finished design feels mysterious, sophisticated, and seasonally appropriate. It is a particularly good choice for anyone who wants Halloween nails that subtly reference vampires while remaining polished enough for evening outfits and formal seasonal events.
Skeleton French Tip Nails
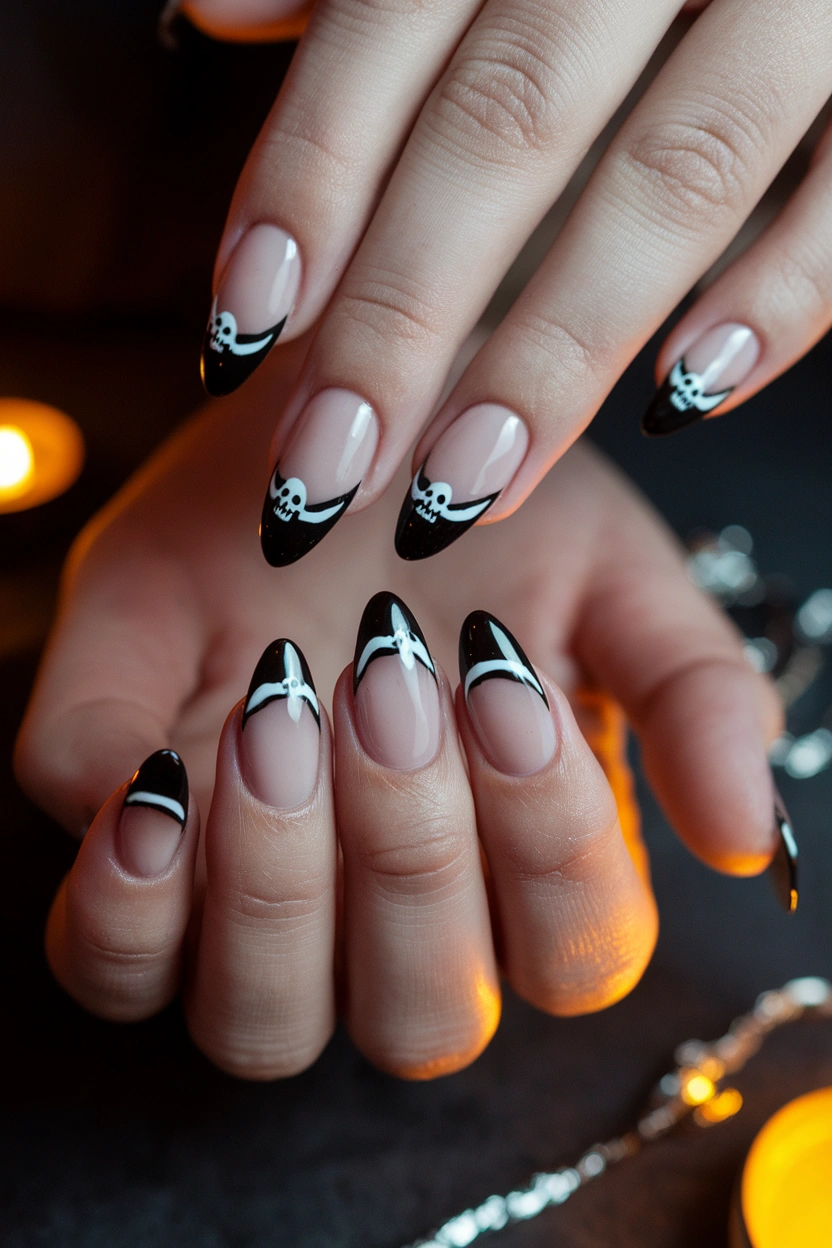
Skeleton French tips combine a classic manicure with a playful Halloween twist. A sheer nude base keeps the nails clean and elegant, while black French tips create a darker seasonal foundation. Tiny white skeleton details can be added near the tips or on selected accent nails for a recognizable spooky touch. Medium almond and oval shapes work beautifully because their elongated silhouette gives the design enough room without making it feel crowded. I’ve noticed that keeping the skeleton artwork simple makes this style much easier to wear and photograph. You can draw tiny bones, skull faces, or small skeletal hands depending on your preferred level of detail. A glossy topcoat keeps the black and white elements crisp and polished. This manicure works particularly well with black outfits, gothic accessories, Halloween parties, and evening events. It is a great choice when you want seasonal nail art that feels spooky but still maintains a refined and elegant overall appearance.
- Combines French tips with Halloween details
- Nude base keeps it sophisticated
- Black and white create strong contrast
- Works beautifully on almond nails
Skeleton French tips can be customized to create either a cute or more gothic appearance. For a minimalist version, keep the black French tips simple and add one tiny skull or bone detail to an accent nail. For a stronger Halloween effect, add small skeletal fingers or bone patterns across two or three nails. The sheer nude base helps prevent the darker artwork from becoming overwhelming and keeps the manicure visually balanced. You can also use deep purple instead of black for a softer seasonal variation. For photographs, use warm candlelight and a dark neutral background to make the white skeleton details stand out clearly. Keep surrounding decorations minimal so the manicure remains the main focus. The finished look feels polished, mysterious, and festive without becoming overly complicated. It is especially suitable for anyone who enjoys gothic Halloween styling but still wants the clean structure of a traditional French manicure.
Cute Spider Accent Nails
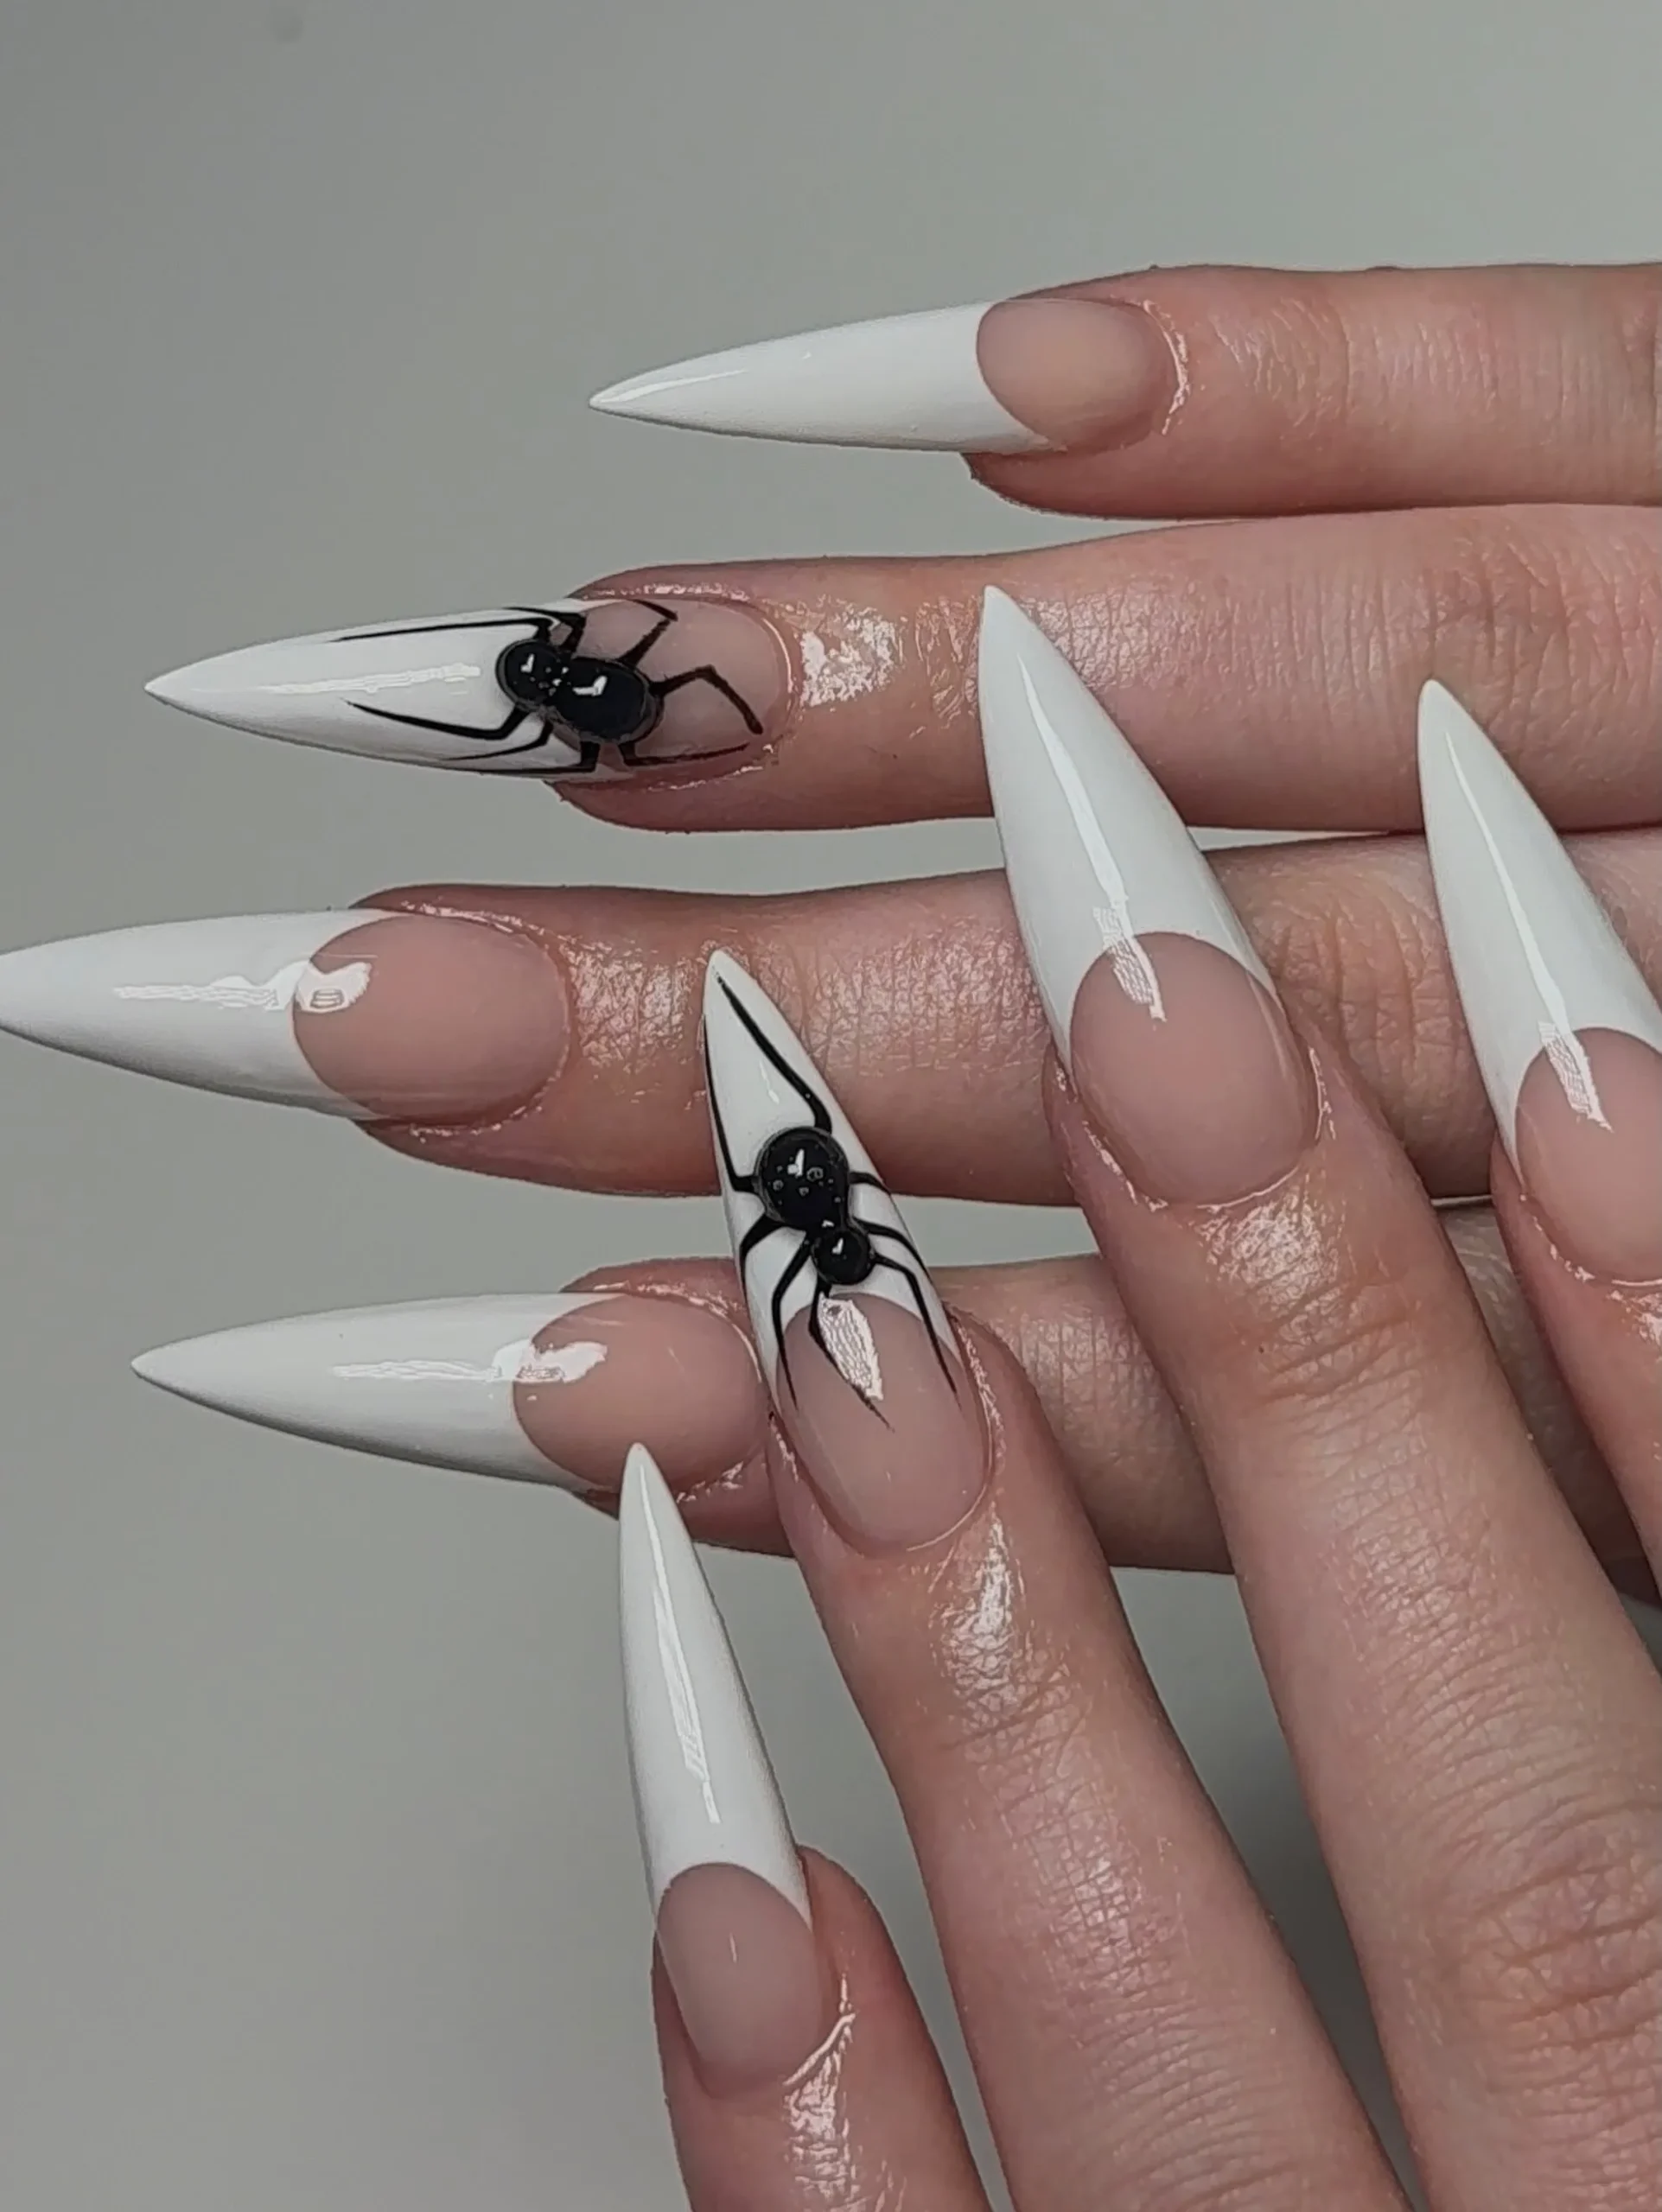
Cute spider accent nails create a playful Halloween manicure without making the entire design feel dark or intimidating. A deep purple, black, or orange base can provide the seasonal foundation, while tiny spiders become the main decorative feature. You can add small spiderwebs to one or two nails and keep the rest solid for a cleaner appearance. Medium rounded, oval, or almond nails all work well because the small illustrations can remain clearly visible without requiring an extremely long nail. I’ve noticed that simple spider shapes with tiny rounded bodies and thin legs often look more charming than highly detailed versions. A glossy finish keeps the colors bright and polished, while tiny silver stars or dots can add extra personality. This design works beautifully for Halloween parties, casual October outfits, costume events, and anyone who enjoys cute spooky nail art. It offers a fun seasonal look while remaining easy to personalize with different colors and small decorative details.
- Creates a cute spooky appearance
- Small spiders keep the design playful
- Works with several Halloween colors
- Easy to personalize with webs
Spider accents can be made especially charming by choosing a softer color palette instead of relying entirely on black. Deep purple, muted orange, cream, or dark burgundy can create a more playful appearance while keeping the manicure seasonal. Place one larger spider on an accent nail and use tiny webs or dots on the surrounding nails for balance. If you prefer minimalist nails, keep the artwork limited to one or two fingers and leave the remaining nails completely solid. A glossy finish helps the tiny spider details remain crisp, while a matte background can create a more modern effect. For Pinterest photography, use warm candlelight, dark fabric, or subtle Halloween decorations around the hand. Avoid adding too many props because the small artwork should remain easy to see. The final manicure feels playful, polished, and festive without being overly scary. It is ideal for anyone who wants Halloween nails with a cute personality and simple details that are easy to recreate.
Glittering Midnight Halloween Nails
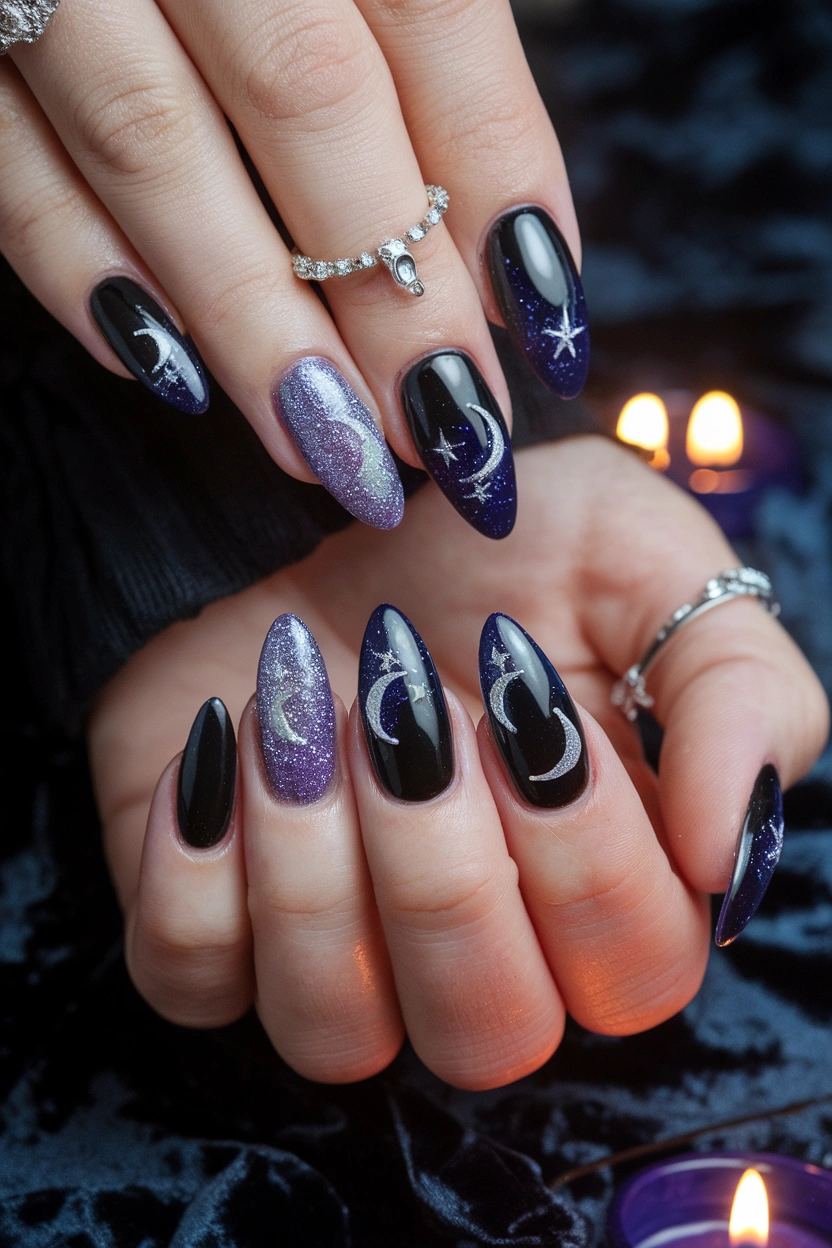
Midnight Halloween nails create a glamorous seasonal look by combining deep dark colors with subtle sparkle and celestial details. A black or midnight navy base gives the manicure a mysterious nighttime feeling, while fine silver glitter adds dimension without becoming overly bright. Tiny crescent moons and stars can be placed on selected nails to create a magical Halloween atmosphere. Medium almond or oval shapes work beautifully because they provide enough space for delicate details while keeping the overall manicure elegant. I’ve noticed that fine glitter usually looks more sophisticated than chunky glitter, especially when paired with darker polish. You can keep most nails solid and use the celestial artwork on two or three accent nails for a balanced appearance. A glossy topcoat enhances the depth of the dark base and helps the glitter catch the light. This design works especially well for evening Halloween parties, gothic outfits, costume events, and anyone who wants spooky nails with a glamorous rather than cartoon-like finish.
- Creates a mysterious nighttime effect
- Fine glitter adds subtle sparkle
- Celestial details enhance the Halloween mood
- Perfect for evening events
Midnight nails can be customized depending on how dramatic you want the finished manicure to feel. Use deep navy when you want a softer interpretation, or choose glossy black for a stronger gothic appearance. Fine silver glitter can be applied across the entire nail or concentrated near the tips for a subtle sparkling effect. Tiny crescent moons, stars, and dots can then be added to selected nails to create a cohesive celestial theme. Keep the artwork delicate so the glitter remains visible instead of becoming visually crowded. For Pinterest photography, dark velvet, soft candlelight, and silver jewelry can reinforce the glamorous nighttime atmosphere. A glossy topcoat will make the dark polish look richer and allow the glitter to reflect light beautifully. The finished design feels mysterious, elegant, and festive while remaining sophisticated enough for evening outfits. It is a beautiful choice for anyone who wants Halloween-inspired nails that capture the magic of a moonlit night with subtle sparkle.
Conclusion
Finding the right Halloween nail design can completely change the way your seasonal look comes together. From spooky ghosts and creepy eyeballs to elegant gothic French tips, pumpkins, spiders, skulls, and mysterious moonlit scenes, there are plenty of ways to express your personality through your manicure. You can keep things cute and playful, choose something dark and dramatic, or combine classic Halloween symbols with polished salon-inspired finishes. Glossy black, deep burgundy, rich purple, orange, and neutral shades all provide beautiful foundations for seasonal artwork. Choose a design that fits your outfit, nail shape, and comfort level, then add small details that make the manicure feel uniquely yours.
Halloween nail art does not have to be complicated to make an impression. Sometimes a simple accent nail, tiny ghost, delicate spiderweb, or dramatic French tip can create the perfect seasonal update. Think about the colors and textures you already enjoy wearing, then choose artwork that complements your personal style instead of overwhelming it. Save your favorite inspiration to Pinterest, show the design to your nail artist, or recreate a simpler version at home. Whether you prefer cute characters, gothic details, spooky scenery, or subtle seasonal accents, the right manicure can make your Halloween outfit feel more complete and memorable.